15 Easy DIY Room Improvements That Transform Your Space
Are you tired of looking at the same four walls every day? You don’t need a massive renovation budget or professional skills to dramatically improve your living space. These 15 achievable DIY projects will help you transform ordinary rooms into extraordinary spaces that reflect your personality and style. From simple upgrades that take minutes to weekend projects that make a major impact, you’ll discover how easy it is to fall in love with your home again. Get ready to roll up your sleeves and create the beautiful, functional spaces you’ve always wanted!
1. Transform Walls With Removable Peel-and-Stick Wallpaper
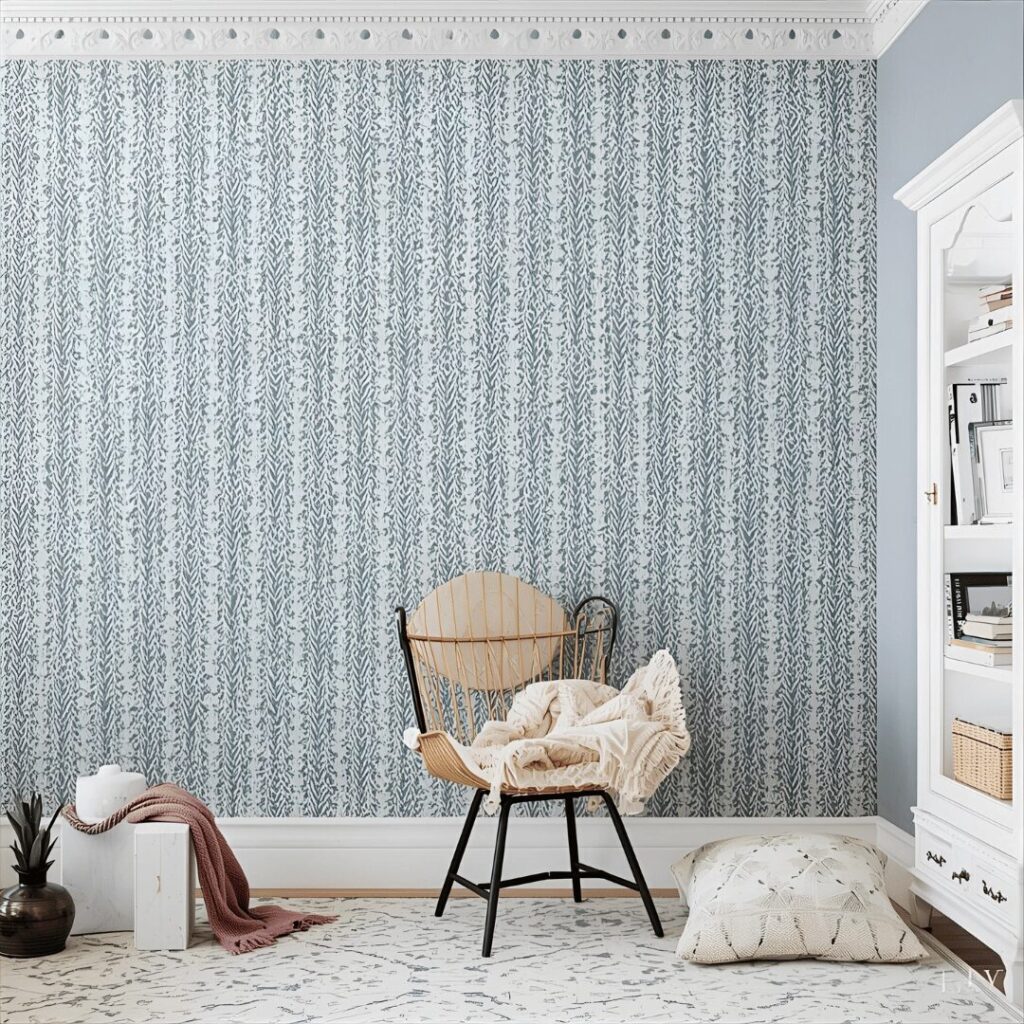
You can completely revolutionize any room in just a few hours with modern peel-and-stick wallpaper that requires no messy paste or professional skills. Today’s removable options come in thousands of patterns, from subtle textures to bold prints, allowing you to create an accent wall or cover an entire room without commitment. The installation process is surprisingly forgiving—simply measure, peel, and stick, smoothing out bubbles as you go. This weekend project delivers maximum visual impact with minimal investment, perfect for renters and homeowners alike. You’ll be amazed how professional your walls look when you choose a pattern that complements your existing decor.
2. Upgrade Basic Lighting With Statement Fixtures
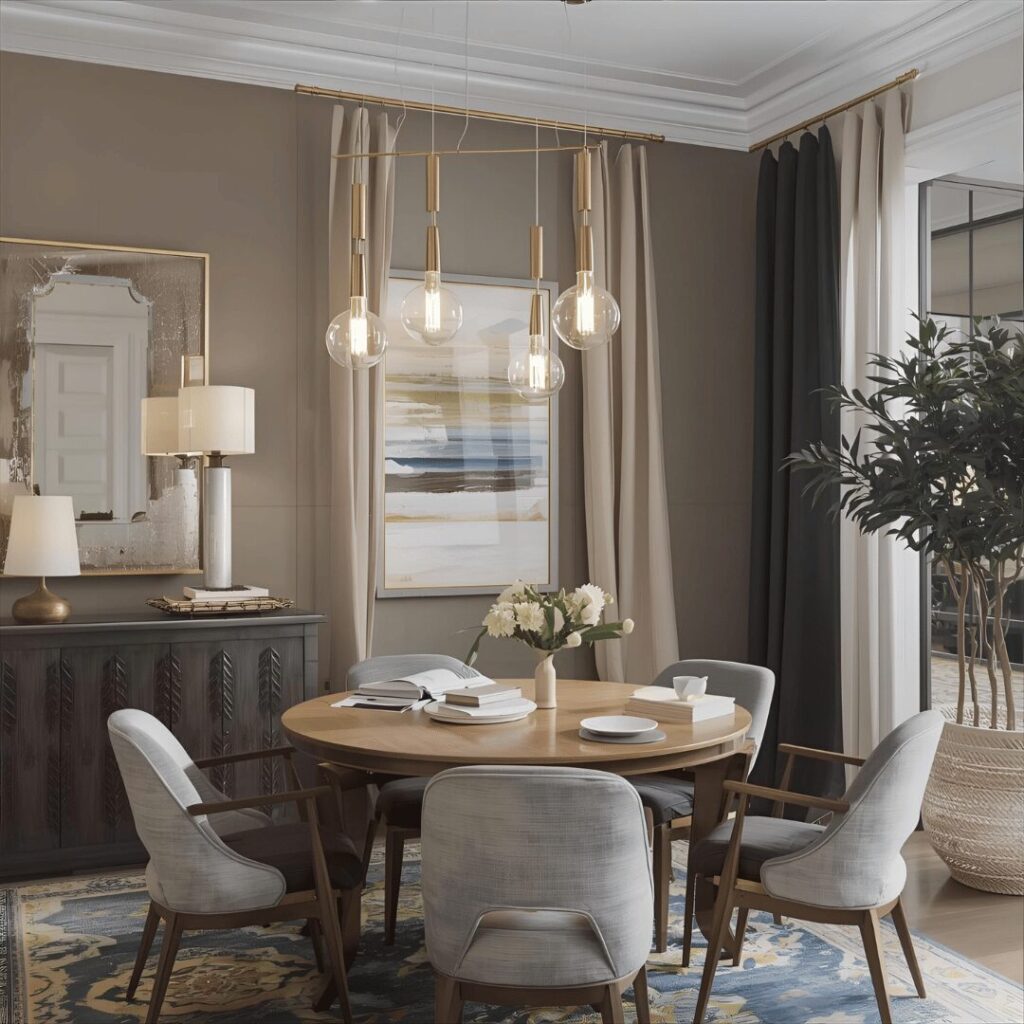
Replace outdated builder-grade lighting with stylish fixtures that serve as functional artwork and completely transform your room’s ambiance. Start by turning off power at the circuit breaker, then follow straightforward online tutorials to safely swap old fixtures for new statement pieces. Consider a dramatic pendant light over your dining table, a modern chandelier in the entryway, or sleek sconces flanking your bathroom mirror. The right lighting not only improves visibility but also establishes your room’s entire mood and style hierarchy. This relatively simple upgrade delivers professional-looking results that make your space feel custom-designed.
3. Install Floating Shelves for Display and Storage
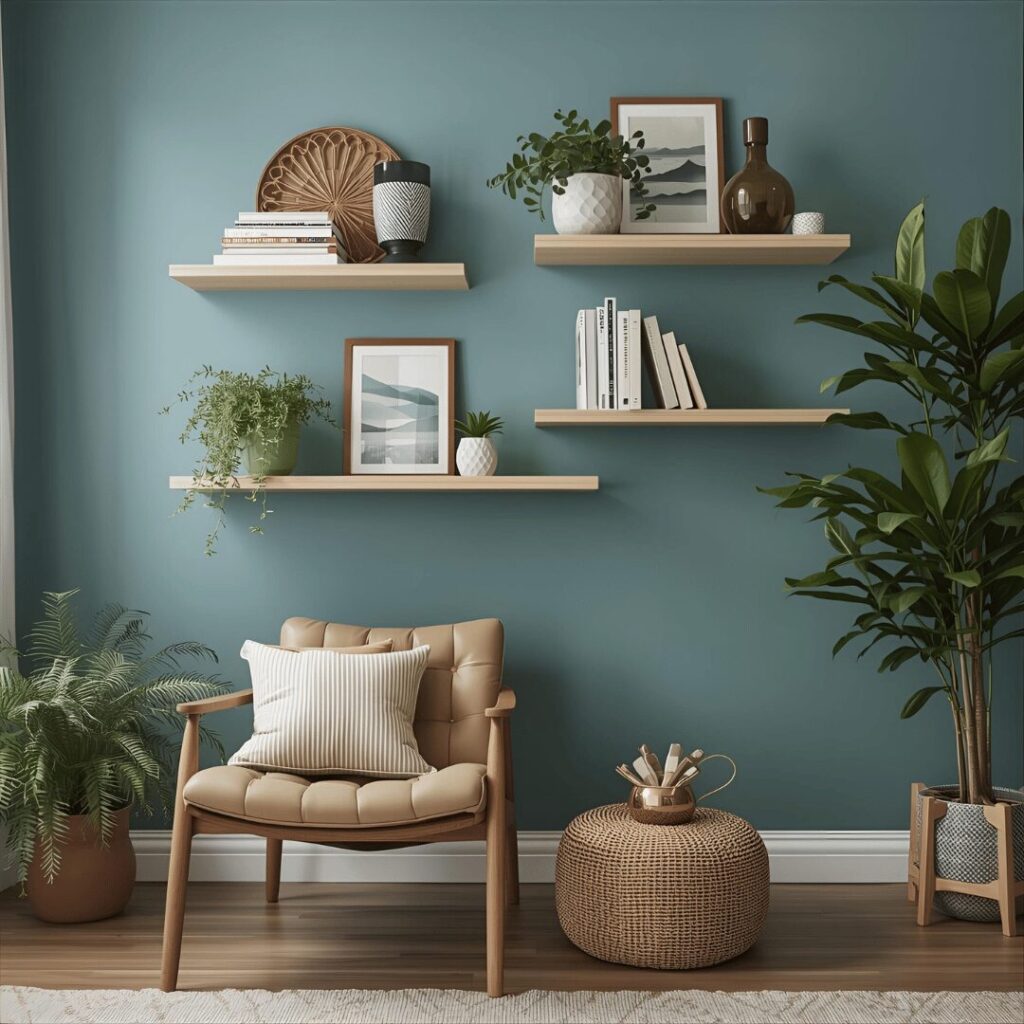
Add both functionality and style to blank walls by installing floating shelves that create display space for cherished items while reducing clutter. You can find complete shelving systems at home improvement stores or create custom shelves using wood and hidden brackets for a truly built-in look. Arrange books, plants, and decorative objects in thoughtful groupings that tell your personal story while keeping everyday items accessible. The installation process typically requires just a level, a drill, and basic mounting hardware, making this an ideal project for DIY beginners. Well-placed shelving draws eyes upward, making rooms feel larger while solving storage challenges beautifully.
4. Refresh Cabinet Hardware Throughout Your Home
Update your kitchen, bathroom, or furniture in under an hour by replacing outdated knobs and pulls with modern hardware that reflects your current style. This simple switch requires just a screwdriver and makes a surprisingly dramatic impact, much like jewelry completes an outfit. Measure existing hole spacing carefully before shopping to ensure new hardware fits perfectly without requiring additional drilling or wood filling. Mix and match finishes for a curated look, or maintain consistency throughout for a cohesive aesthetic. This budget-friendly upgrade delivers instant satisfaction and makes cabinetry feel brand new for a fraction of replacement cost.
5. Create a Custom Accent Wall With Wood Slats
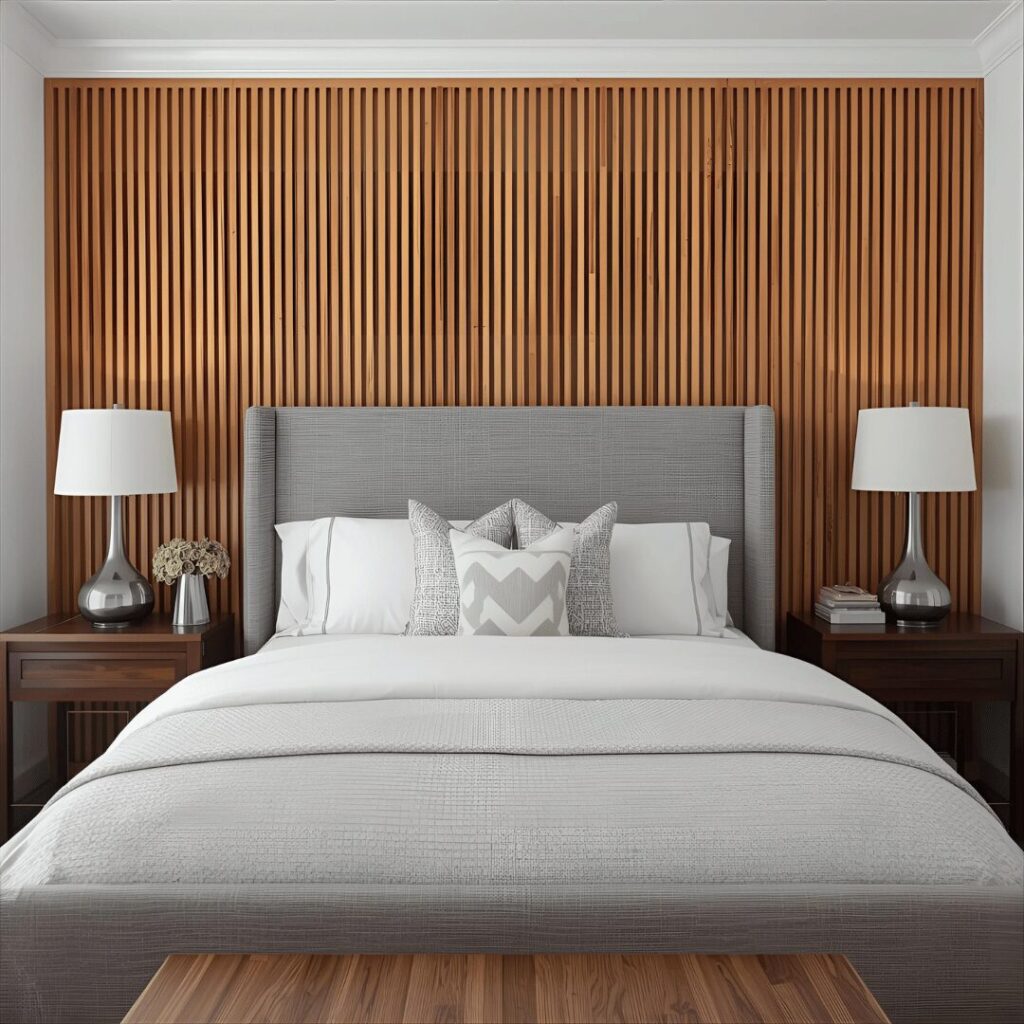
Make a dramatic style statement by installing wood slats to create texture and visual interest on a focal wall behind your bed or sofa. This trending project uses inexpensive wood strips (like 1x2s or 1x3s) applied vertically or horizontally to completely transform a room’s character. You can stain the wood for a natural look, paint it to match your trim, or create contrast with a bold color choice that complements your decor. The installation process involves measuring, cutting, and attaching wood strips to wall studs using a level and nail gun or construction adhesive. This intermediate DIY project delivers custom, high-end results that look professionally installed.
6. Apply Fresh Caulk for a Clean, Finished Look
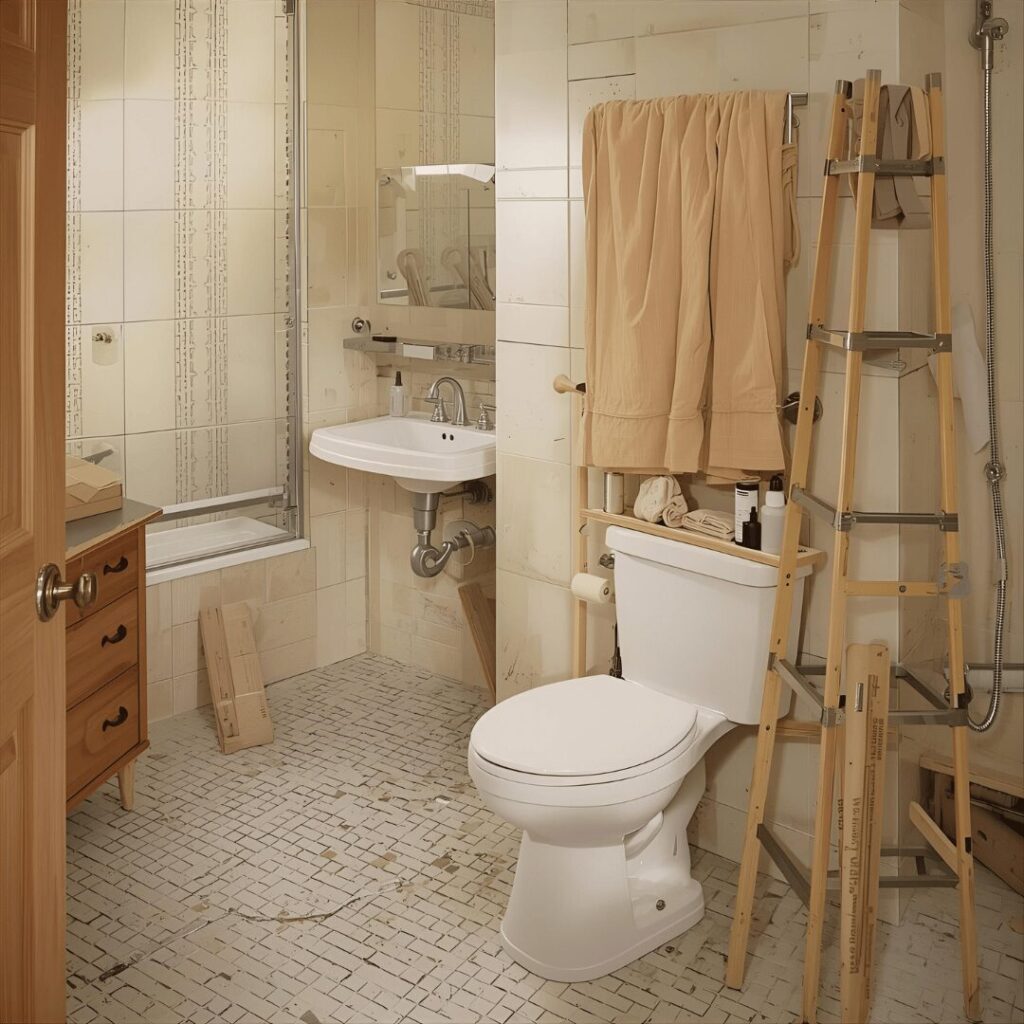
Revitalize tired bathrooms and kitchens in less than an hour by replacing old, discolored caulk with fresh, clean lines that make everything look newer. Remove existing caulk using a utility knife or caulk removal tool, clean the area thoroughly with rubbing alcohol, then apply a smooth bead of mold-resistant silicone caulk. Use your finger (dipped in soapy water) or a caulk smoothing tool to create perfect, professional-looking seams around tubs, sinks, and countertops. This nearly free improvement requires minimal tools but delivers maximum impact by eliminating the dingy appearance of old, mildewed caulk. The crisp, clean results make your entire space feel better maintained and more luxurious.
7. Build a Custom Window Seat With Storage
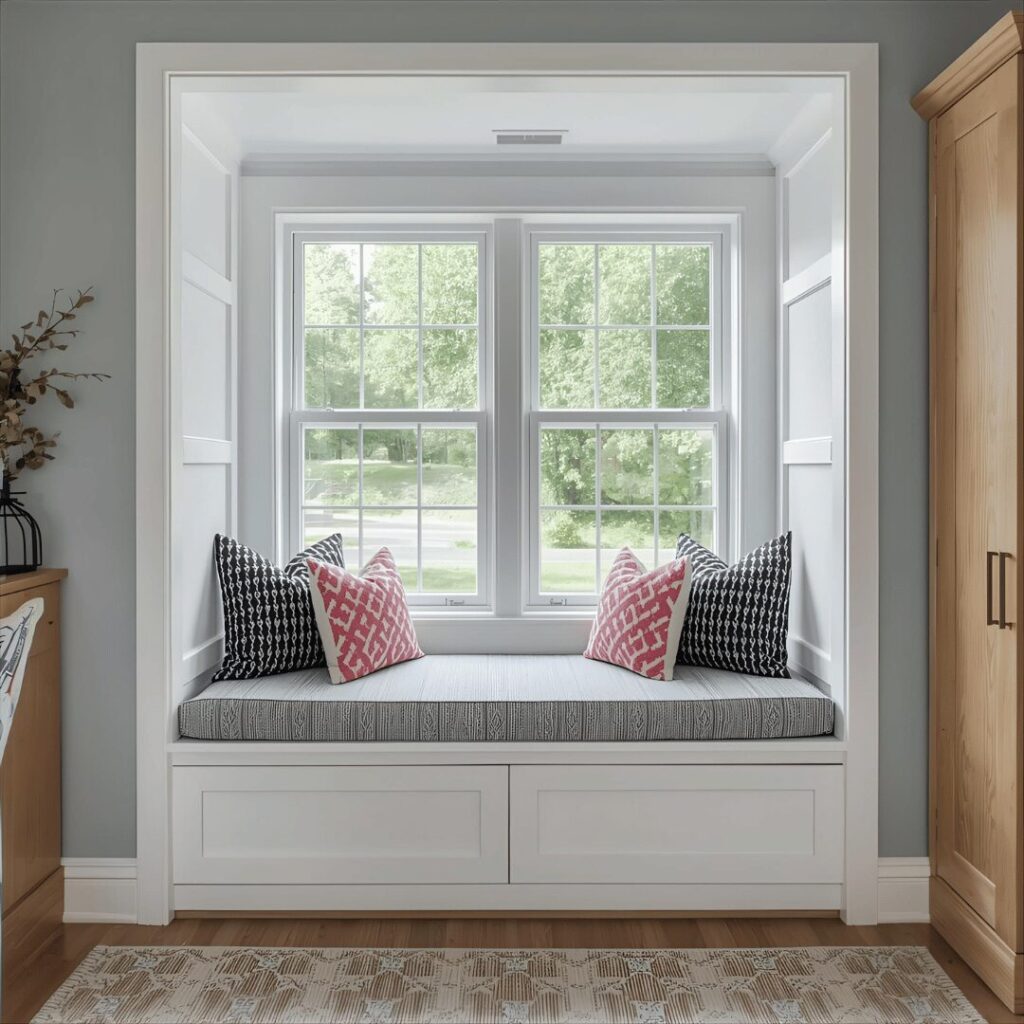
Transform an underutilized window nook into a charming reading corner with hidden storage by building a simple window seat bench. Construct a basic box frame from plywood or 2x4s, add a hinged top for access to storage inside, and finish with comfortable cushion and decorative pillows. Customize the dimensions to perfectly fit your space, and paint or stain the exterior to match your existing trim and decor. This beginner-to-intermediate woodworking project provides both functional seating and valuable storage for blankets, books, or seasonal items. The finished result creates a cozy, custom-built feature that adds character and practicality to any room.
8. Update Switch Plates and Outlet Covers
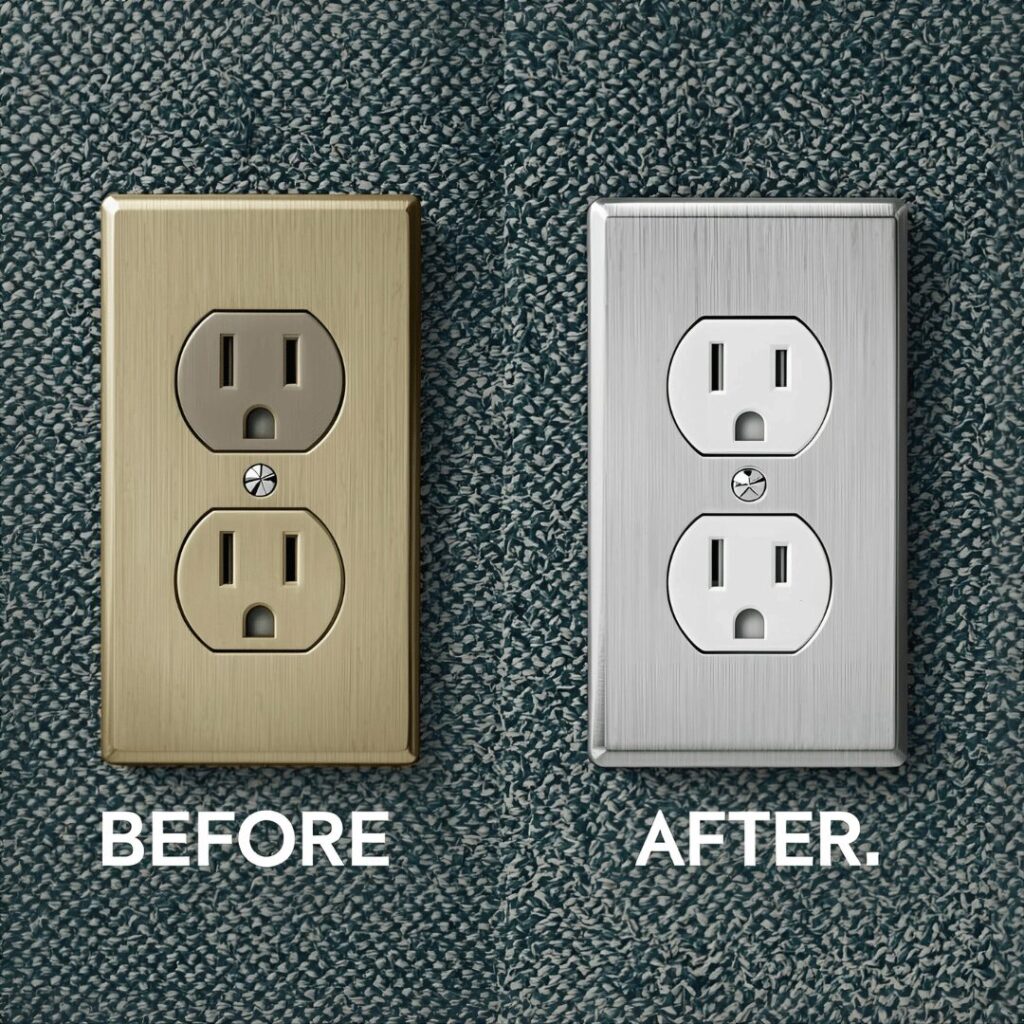
Refresh every room in your home with this 5-minute upgrade that costs less than $50 total but makes a noticeable difference throughout your space. Replace basic plastic switch plates and outlet covers with stylish options in brushed brass, matte black, chrome, or even decorative patterned designs. Remember to turn off power at the circuit breaker before swapping covers for absolute safety, using a voltage tester to confirm wires aren’t live. This subtle detail coordinates with your lighting fixtures and hardware to create a polished, cohesive look that shows you’ve attended to even the smallest elements. The cumulative effect makes your entire home feel more intentionally designed and carefully maintained.
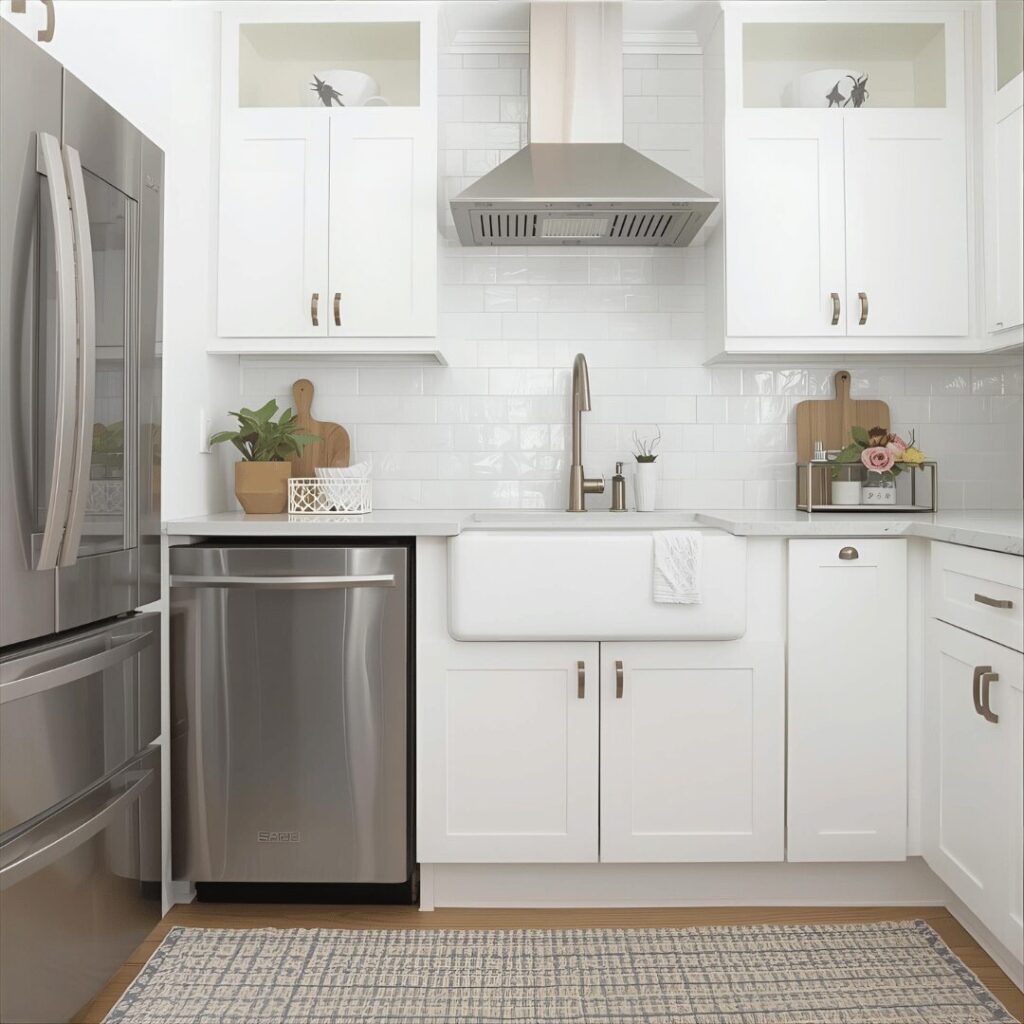
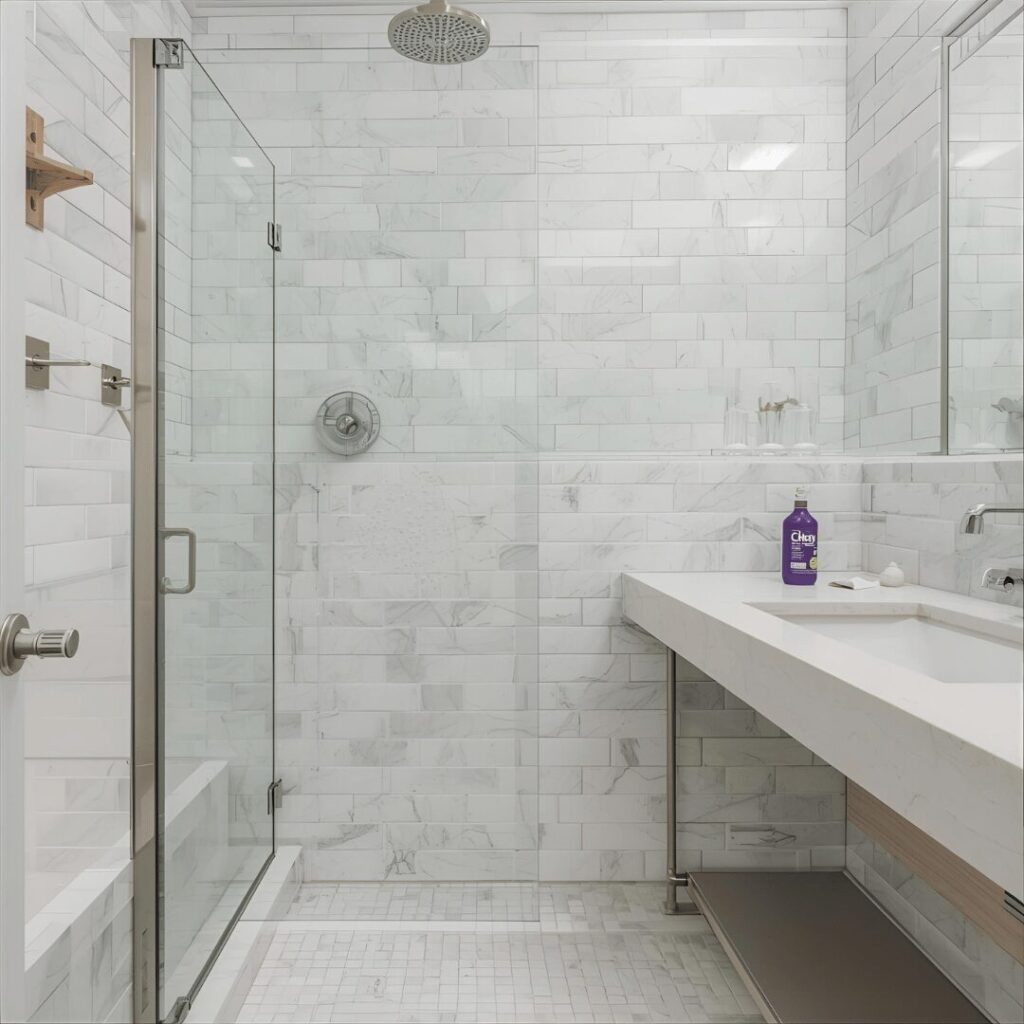
9. Install a Stylish Backsplash in Kitchen or Bath
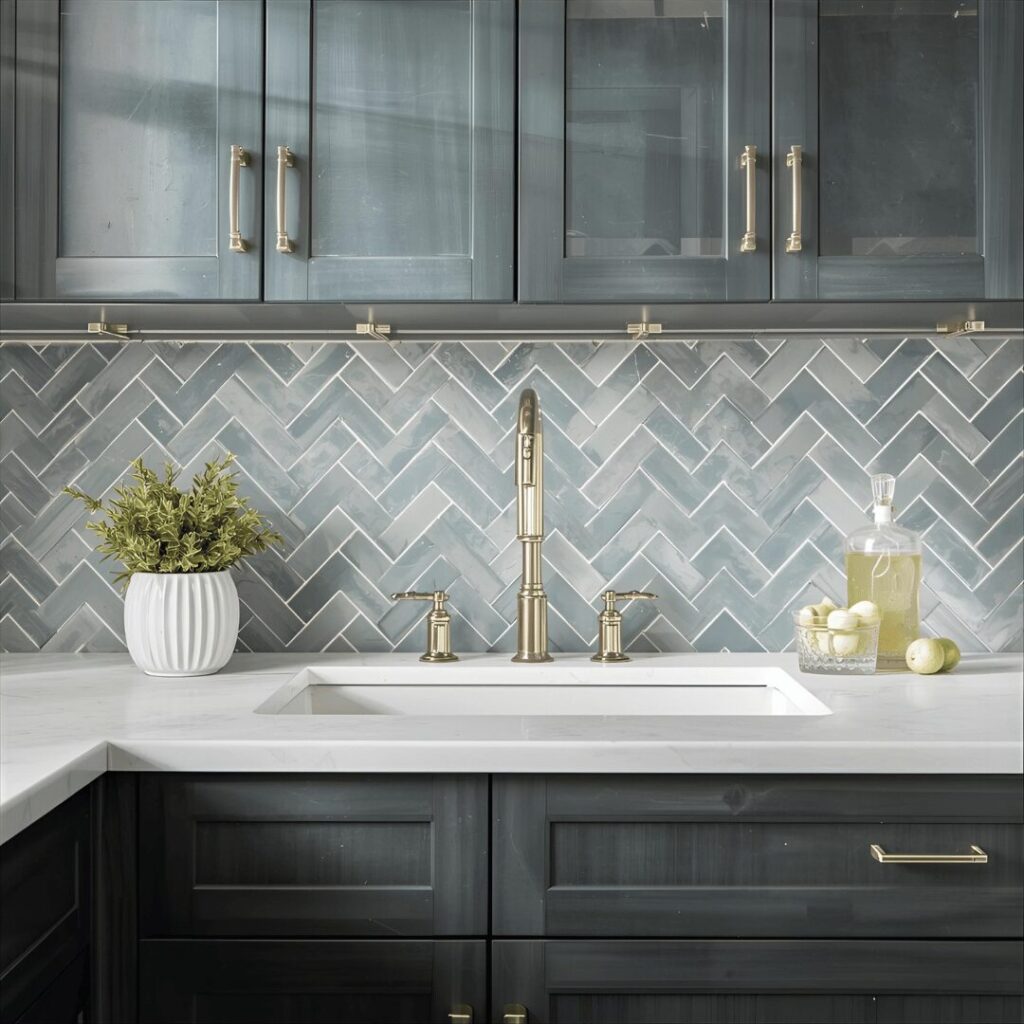
Elevate your kitchen or bathroom with a DIY-friendly backsplash that protects walls while adding personality and visual interest. Modern peel-and-stick tile options provide the look of real tile or stone without the mess of thinset mortar, making installation accessible for beginners. Alternatively, traditional subway tile installed with matte adhesive offers a classic look that’s surprisingly achievable with a tile cutter, notched trowel, and grout float. A well-executed backsplash creates a focal point, ties together your color scheme, and makes your space feel custom-finished. This weekend project delivers professional-looking results that significantly increase your home’s perceived value.
10. Create Under-Bed Storage Solutions
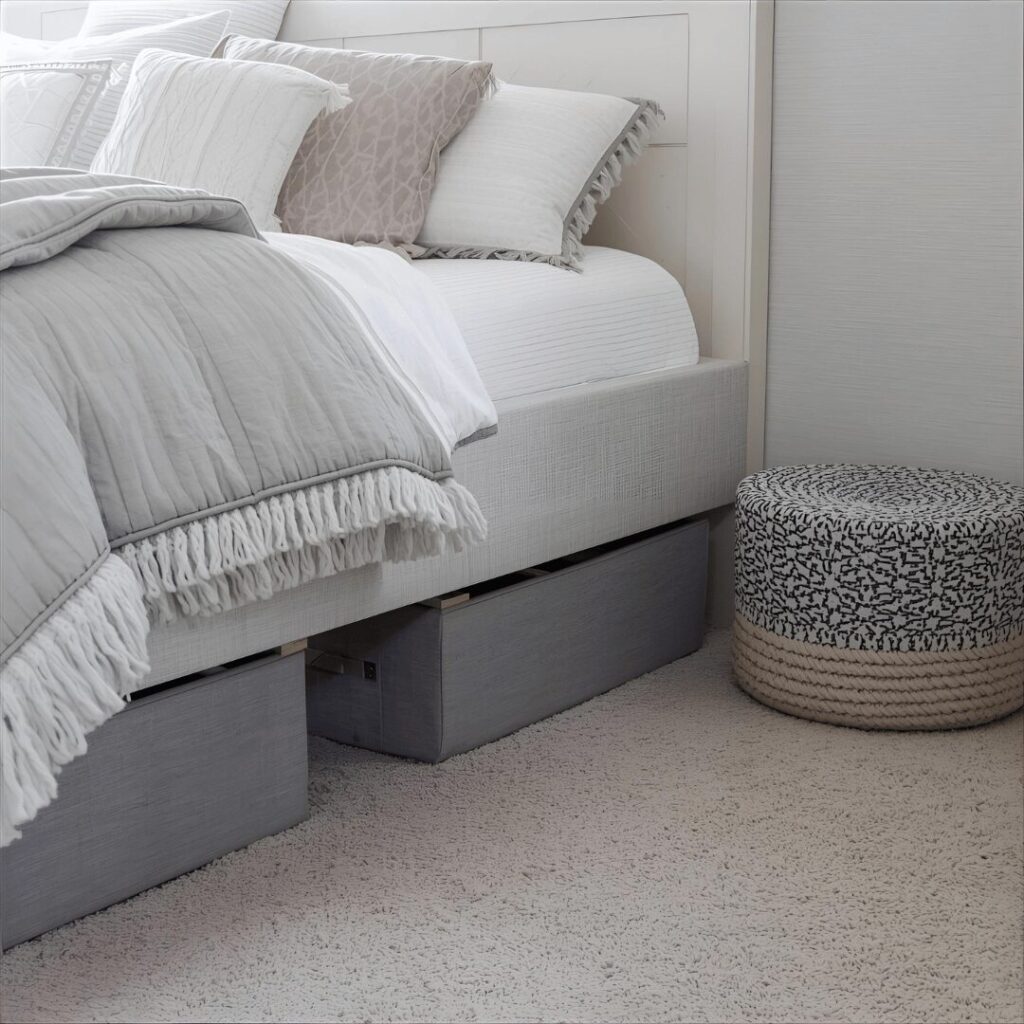
Maximize space in bedrooms by implementing clever under-bed storage solutions that keep items accessible yet out of sight. Use wheeled storage bins specifically designed to slide easily under bed frames, perfect for storing off-season clothing, extra linens, or hobby supplies. For a more custom solution, build simple wooden platforms that lift your bed to create additional vertical space for larger storage containers. This organizational project takes less than an afternoon but dramatically increases your functional storage capacity without consuming valuable floor space. The resulting clutter-free bedroom feels more serene and spacious, promoting better rest and relaxation.
11. Paint Interior Doors for Instant Character
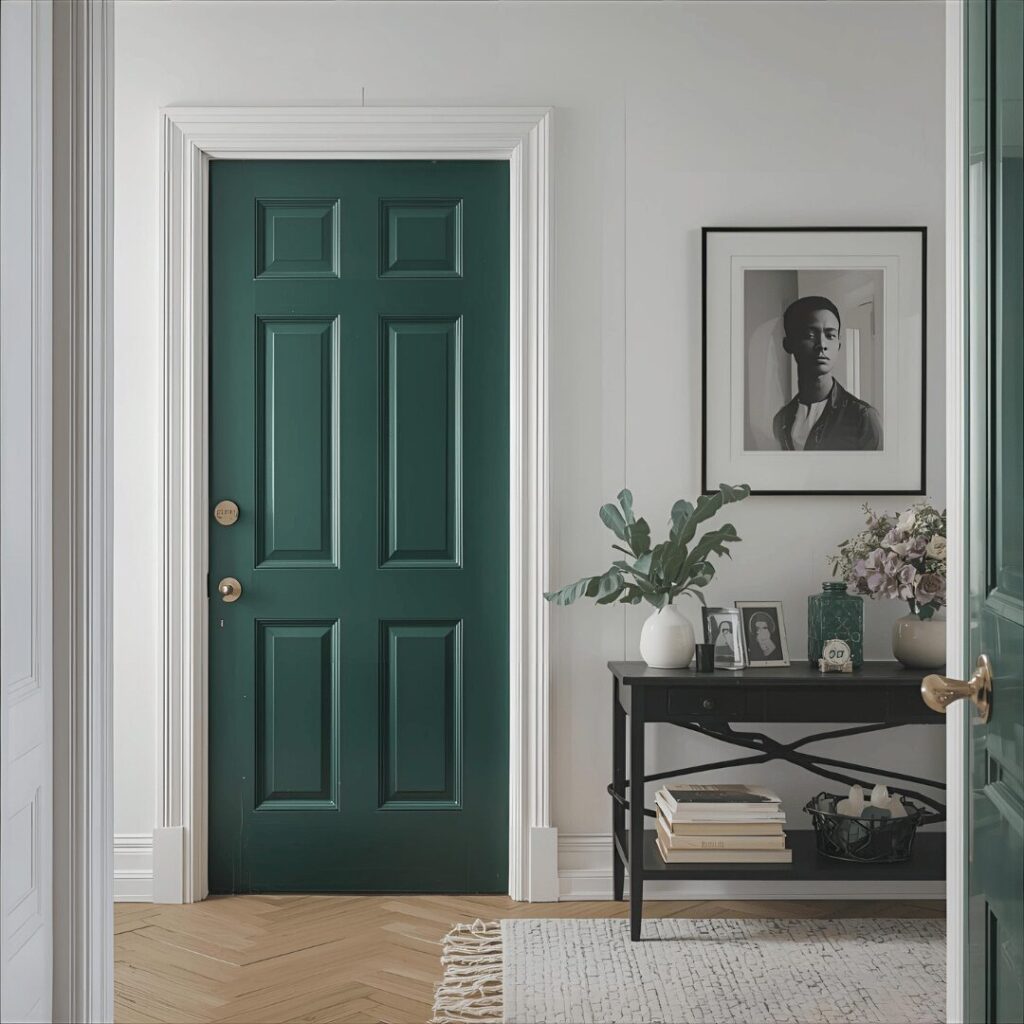
Transform plain interior doors into striking design statements by painting them with bold colors or sophisticated finishes that command attention. Choose a dramatic black, deep navy, or rich emerald for doors you want to highlight, or a subtle, sophisticated gray for a more understated elegance. Proper preparation—including cleaning, sanding, and using high-quality painter’s tape—ensures professional-looking results that elevate your entire space. Consider painting both sides for a cohesive look, or just the room-facing side if you prefer a surprise of color. This low-cost project delivers high visual impact, making your doors look like expensive custom features rather than builder-grade basics.
12. Build a Vertical Herb Garden for Your Kitchen
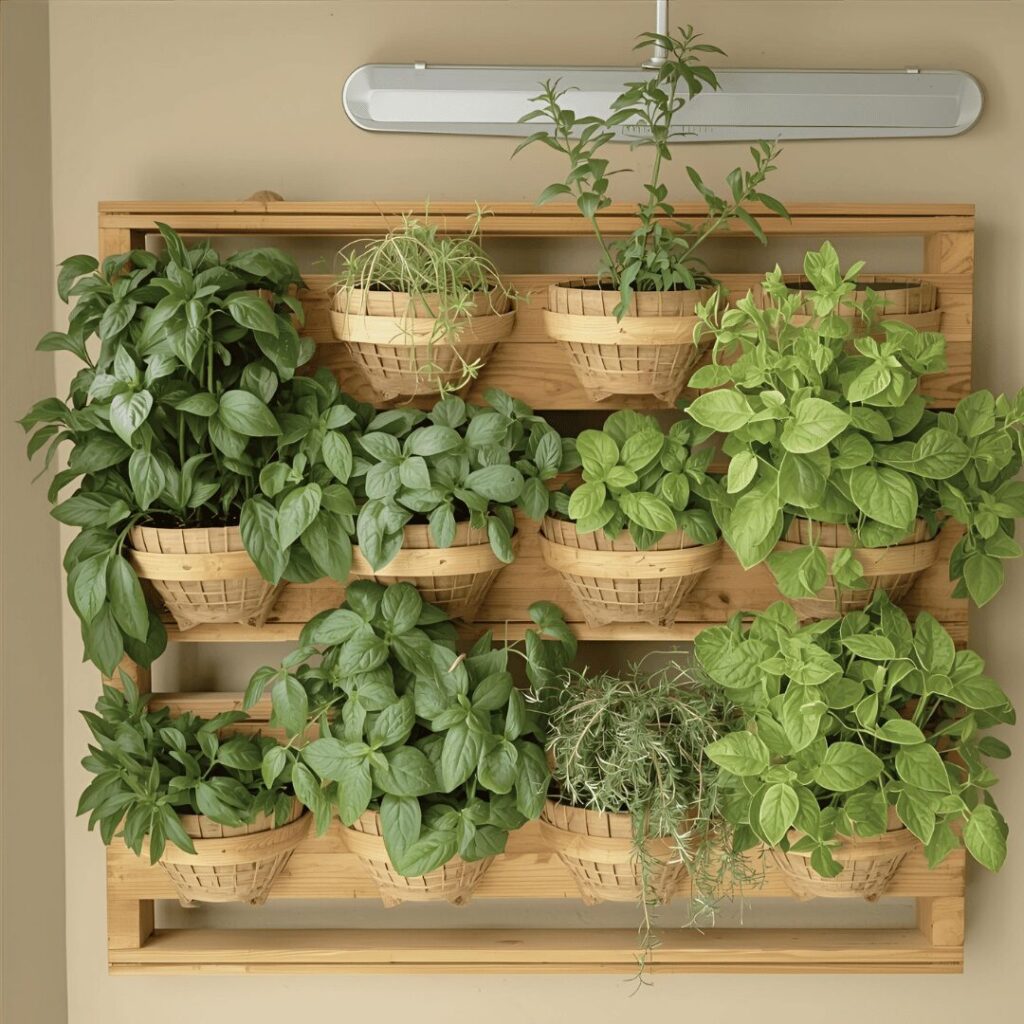
Create a functional, beautiful living wall by building a vertical herb garden that brings freshness and nature into your kitchen. Use a simple wooden pallet, hanging pockets, or wall-mounted containers to grow basil, mint, rosemary, and other culinary herbs within easy reach while cooking. This project combines basic woodworking skills with the joy of gardening, resulting in both decorative appeal and practical benefits. Position your herb garden near a sunny window or under grow lights to ensure your plants thrive year-round. The living element adds texture and vitality to your kitchen while providing fresh flavors for your cooking.
13. Install Crown Molding for Architectural Interest
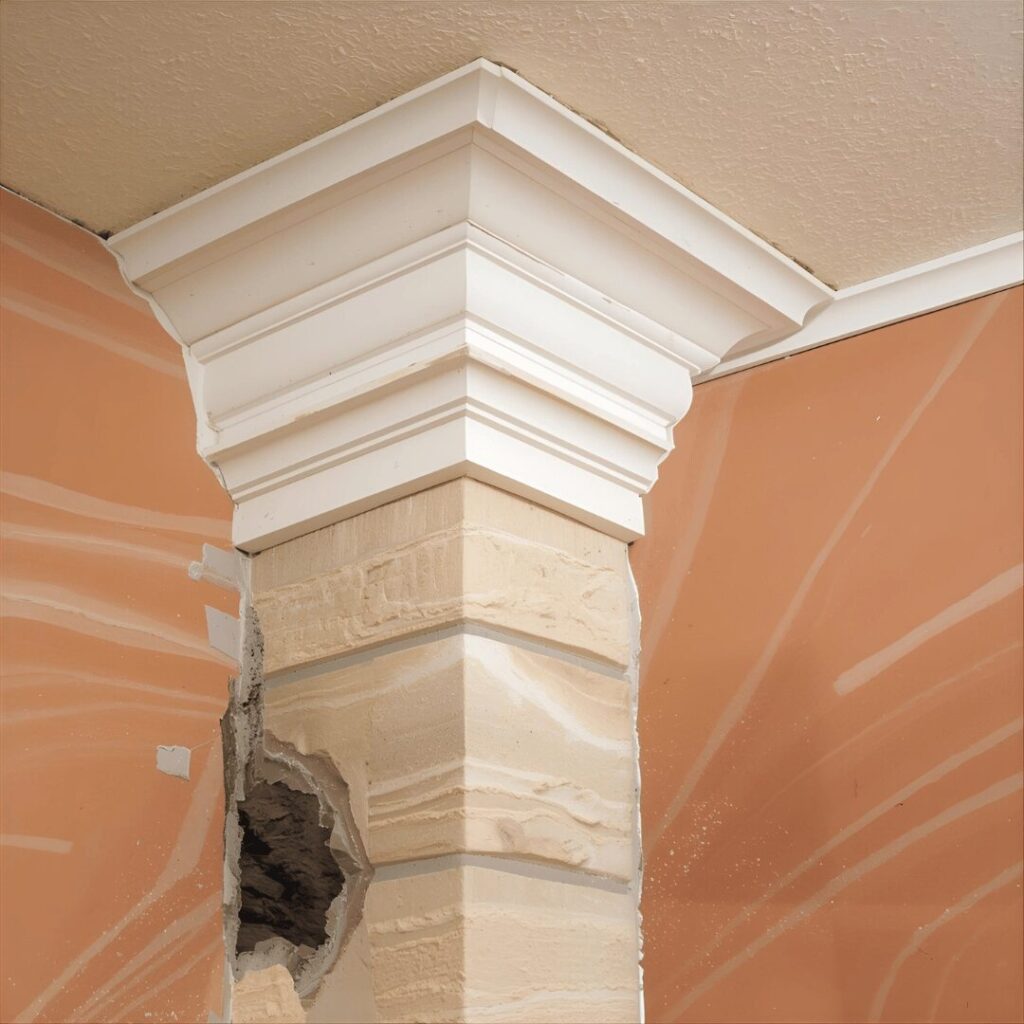
Elevate ordinary rooms with the sophisticated finish of crown molding that adds architectural character and a custom-built look. Start with simple, flat stock molding if you’re new to trim work, or choose more elaborate profiles as your skills advance. Use a miter saw to create precise 45-degree angle cuts for corners, and coped joints for the most professional-looking results where walls meet unevenly. The installation process involves measuring, cutting, and nailing the molding to wall studs, then filling nail holes and seams with caulk before painting. This classic architectural detail makes ceilings appear higher and rooms feel more polished and complete.
14. Create a Gallery Wall With Personal Photos and Art
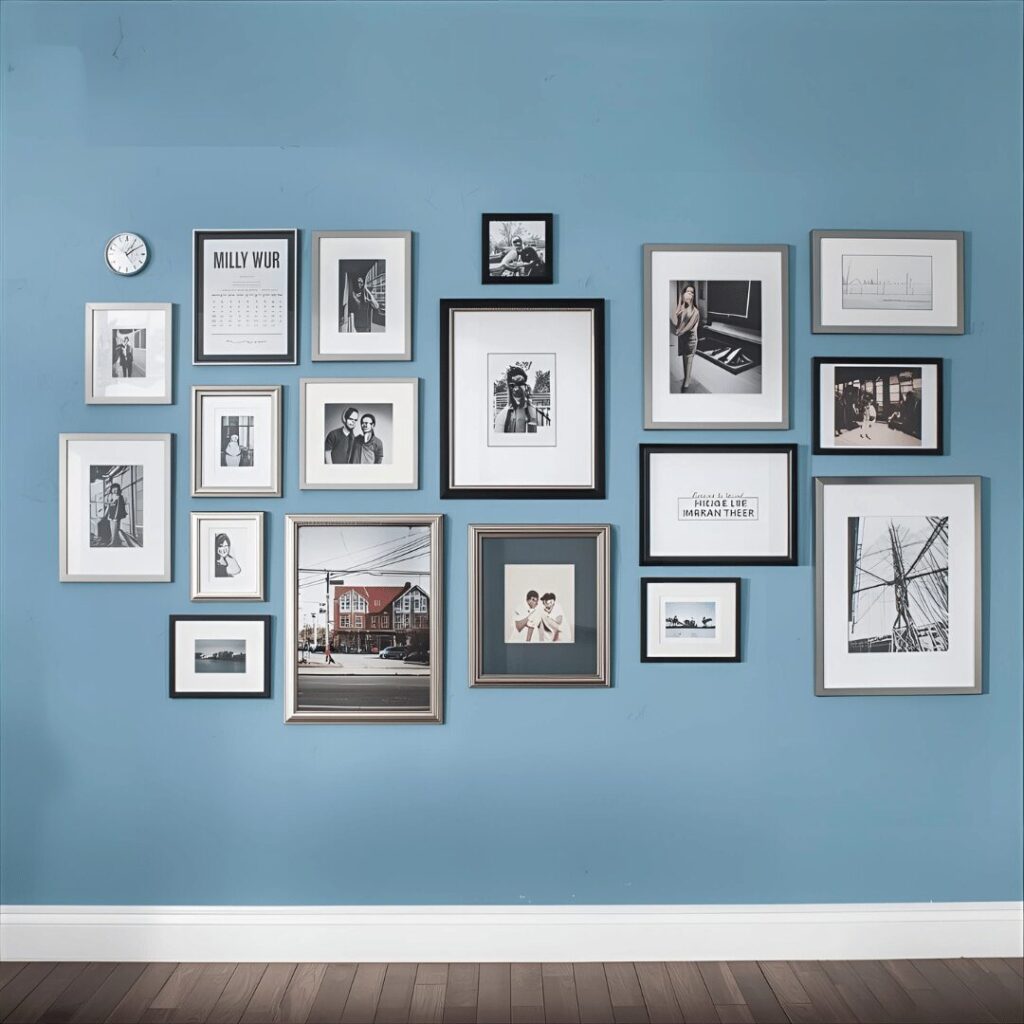
Transform a blank wall into a personalized focal point by carefully arranging a collection of framed photographs, artwork, and memorabilia. Lay out your arrangement on the floor first to perfect the composition, mixing frame sizes, orientations, and matting for visual interest. Use a level and measuring tape to ensure proper spacing, or create paper templates of each frame to tape on the wall before installing hardware. This highly personal project allows you to display your memories and tastes in a curated way that tells your unique story. The finished gallery wall becomes an instant conversation starter that makes your space feel deeply personal and thoughtfully designed.
15. Refresh Grout Lines for a Like-New Look
Revitalize tired tile floors, backsplashes, and showers in just a few hours by cleaning and refreshing discolored grout lines. Use a grout cleaning pen or a small brush with oxygenated bleach to brighten existing grout, or apply a grout colorant for more dramatic transformation. For severely stained or damaged grout, carefully remove the old material with a grout saw and apply new grout following package directions. This detailed but straightforward process makes dated tile look brand new, extending its life and improving your room’s overall appearance. The crisp, clean lines create a fresh, well-maintained look that suggests your entire home has been meticulously cared for.
Start Your DIY Transformation Today
You now have 15 achievable projects that can dramatically improve your living space without requiring professional help or breaking your budget. Remember that the most successful home improvements start with proper preparation, quality materials, and realistic expectations about your skill level and available time. Whether you begin with simple hardware swaps or dive into more involved projects like installing crown molding, each improvement brings you closer to creating a home that truly reflects your personality and meets your needs. Your dream space is waiting to be uncovered—gather your tools, trust your capabilities, and enjoy the rewarding process of making your house truly your own.