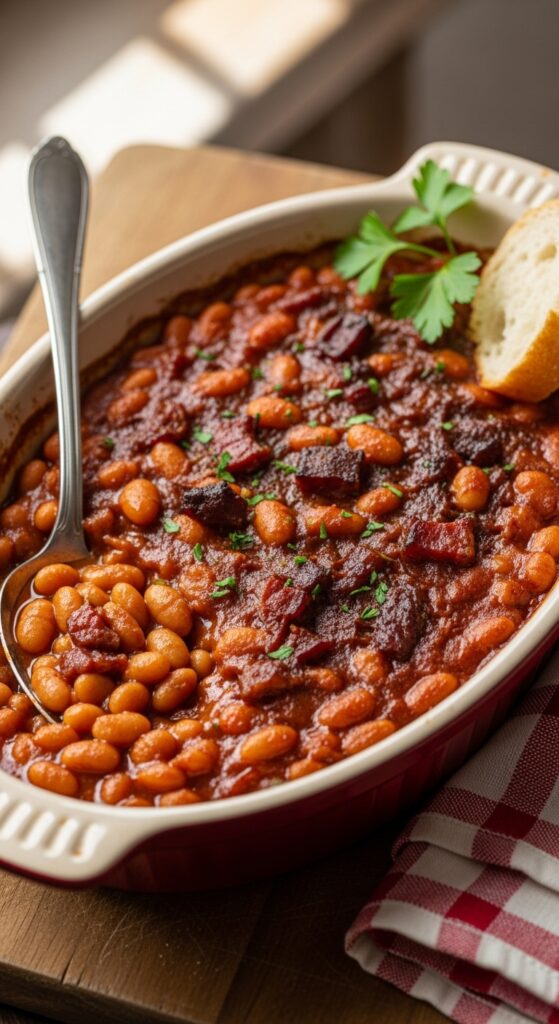
From Can to Classic: The Ultimate Homemade Baked Beans Recipe

Let’s be honest. For many of us, our first memory of baked beans comes from a can. Those sweet, slightly mushy beans in tomato sauce are a nostalgic comfort, a quick side dish for toast, and a barbecue staple. But what if I told you that the world of baked beans extends far beyond the pull-tab lid? That there exists a version so deeply flavorful, so rich and complex, that it transforms this humble dish into the undeniable star of the table?
Welcome to the journey of creating homemade baked beans from scratch. This isn’t just cooking; it’s a lesson in patience and layering flavors. We’re talking about tender beans swimming in a sauce that’s simultaneously sweet, smoky, tangy, and deeply savory. Imagine the rich depth of molasses, the sharp kick of mustard, the smoky whisper of bacon, and the tender embrace of perfectly cooked beans, all slow-simmered to meld into something truly extraordinary. This recipe is your guide to achieving that greatness. It’s a project that rewards your effort with a pot of beans that will make you wonder why you ever settled for anything less.
Why Go Through the Trouble? The Case for Homemade
You might be asking, “Why spend hours making something I can buy for a few dollars?” The answer lies in the transformation. Canned beans are a monologue of sugar and tomato. Homemade baked beans are a symphony. You have complete control over the texture, the sweetness, the smokiness, and the salt. You can achieve a sauce that is rich and glossy, not watery or gloopy. You can ensure each bean is tender but still holds its shape, not disintegrating into the mix. This is about creating a side dish so good it could be a main course, a dish that carries the pride of your effort in every single bite. It’s about the alchemy of simple, wholesome ingredients transforming into comfort food perfection.
The Foundation: Deconstructing the Perfect Baked Bean
Before we dive into the recipe, let’s understand the key components that we will be building layer by layer.
- The Bean: The canvas for our masterpiece. We need a sturdy bean that can withstand a long, slow cook without turning to mush. Navy beans (also called haricot beans) are the classic choice for their small size, creamy texture, and ability to absorb flavors beautifully.
- The Pork: The soul of depth and smokiness. Salt pork is traditional, but thick-cut bacon or pancetta work wonderfully, providing rendered fat to cook our aromatics and unrivaled savory flavor.
- The Aromatics: The aromatic base, or soffritto, builds the first layer of flavor. Onion and garlic are essential, sautéed slowly in the rendered pork fat until sweet and fragrant.
- The Sauce: The heart of the dish. This is a complex blend of sweet, tangy, and savory elements. We’ll use tomato paste for umami depth, ketchup for its sweet-tangy base, molasses for its deep, bittersweet richness, mustard for sharpness, and apple cider vinegar for a bright, balancing acidity.
- The Liquid: The medium that brings it all together. A combination of bean-cooking liquid (or broth) and water will create our simmering sauce, enriched by all the other ingredients.
- The Time: The secret ingredient. Baked beans cannot be rushed. A long, gentle simmer in the oven is what allows the flavors to marry, the sauce to thicken, and the beans to become incredibly tender.
Gathering Your Arsenal: Ingredients & Equipment
This recipe uses accessible ingredients, but their quality matters. This is where you build your flavor foundation.
Ingredients:
- 1 pound (about 2 ½ cups) dried navy beans: Picked over and rinsed.
- 8 ounces thick-cut bacon or salt pork, diced: This will be our primary source of fat and smoky flavor.
- 1 large yellow onion, finely chopped
- 4 cloves garlic, minced
- ⅔ cup molasses: Not blackstrap, which is too bitter. Use light or dark molasses for the best flavor.
- ½ cup ketchup: Provides a tomatoey sweetness and body.
- ¼ cup packed dark brown sugar: Adds a caramel-like sweetness that complements the molasses.
- 2 tablespoons apple cider vinegar: Essential for cutting through the richness.
- 2 tablespoons Dijon mustard: For a sharp, tangy backbone.
- 2 tablespoons tomato paste: Concentrates the umami flavor.
- 1 tablespoon Worcestershire sauce: Adds a complex, savory depth.
- 1 teaspoon smoked paprika: Enhances the smoky profile, especially if your bacon is milder.
- ½ teaspoon black pepper
- A pinch of cayenne pepper (optional): For a subtle, background heat.
- 8 cups water or a mix of water and reserved bean-cooking liquid
- Salt to taste (added at the end)
Essential Equipment:
- A Large Dutch Oven: This is non-negotiable. A heavy-bottomed Dutch oven distributes heat evenly, preventing hot spots that can burn the sauce and ensuring a perfect, gentle simmer. An oven-safe pot with a tight-fitting lid is crucial.
- Wooden Spoon: For stirring and scraping up the flavorful bits from the bottom of the pot.
- Measuring Cups and Spoons
- A Sharp Knife and Cutting Board
The Roadmap to Perfection: A Step-by-Step Guide
This process is broken down into stages. Read through them all before you begin to understand the flow.
Step 1: The Great Bean Soak (Overnight or Quick Method)
Dried beans need to be rehydrated before cooking. This step is crucial for even cooking and achieving that perfect creamy texture.
- Overnight Soak (Recommended): Place the rinsed beans in your Dutch oven or a large bowl and cover with at least 3 inches of cold water. Let them soak at room temperature for 8-12 hours. They will plump up significantly.
- Quick Soak Method: In a pinch, place the rinsed beans in the Dutch oven, cover with water, and bring to a boil. Boil for 2 minutes, then remove from heat, cover, and let stand for 1 hour.
After soaking, drain the beans and rinse them once more. This helps remove some of the complex sugars that can cause, ahem, digestive discomfort.
Step 2: The Initial Bean Simmer
Return the soaked and drained beans to the clean Dutch oven. Cover them with fresh water by about 2 inches. Bring to a boil, then reduce the heat and simmer gently, partially covered, for about 45-60 minutes. You’re not cooking them all the way through—just until they are tender but still firm in the center. They should be al dente, like a perfectly cooked pasta. Drain the beans, but RESERVE THE COOKING LIQUID. This starchy, flavorful liquid is gold for our sauce.
Step 3: Building the Flavor Foundation
Preheat your oven to 300°F (150°C). This low and slow temperature is key.
- In the now-empty Dutch oven, cook the diced bacon over medium heat until it’s crispy and has rendered its fat. Use a slotted spoon to remove the bacon, leaving the beautiful rendered fat behind. This crispy bacon will be our garnish, adding texture at the end.
- Add the chopped onion to the bacon fat and cook until soft and translucent, about 5-7 minutes. Add the minced garlic and cook for another minute until fragrant. Do not let the garlic burn.
- Push the onions and garlic to the side and add the tomato paste to the center of the pot. Let it cook for a minute, stirring, until it darkens slightly. This “toasting” deepens its flavor dramatically.
Step 4: Creating the Signature Sauce
This is where the magic happens. To the pot with the onions, garlic, and tomato paste, add the molasses, ketchup, brown sugar, apple cider vinegar, Dijon mustard, Worcestershire sauce, smoked paprika, black pepper, and optional cayenne. Stir everything together into a thick, fragrant paste. It will smell incredible.
Step 5: The Grand Assembly and the Slow Bake
- Add the drained, par-cooked beans and the crispy bacon back into the Dutch oven. Pour in about 6-8 cups of the reserved bean-cooking liquid (or water/broth), enough to just cover the beans. Stir everything together until well combined.
- Bring the pot to a gentle simmer on the stovetop. Once simmering, cover it with a tight-fitting lid and carefully transfer it to the preheated oven.
- Now, you wait. Let the beans bake for 4 to 6 hours. Yes, you read that correctly. Check the beans every hour or so after the first 3 hours. Give them a gentle stir and check the liquid level. If they look like they’re drying out, add a bit more of the reserved cooking liquid or hot water. The beans are done when the sauce is thick, glossy, and dark, and the beans are meltingly tender.
Step 6: The Final, Critical Adjustments
Once the beans are out of the oven, it’s time for the most important step: tasting and seasoning. Do not add salt until now. The bacon and cooking liquid have salt, and adding it early can toughen the beans. Add salt gradually, stirring and tasting after each addition, until the flavors truly sing. You might also find you want another splash of vinegar for brightness or a pinch more sugar for balance. This is your moment to make the dish perfect for your palate.
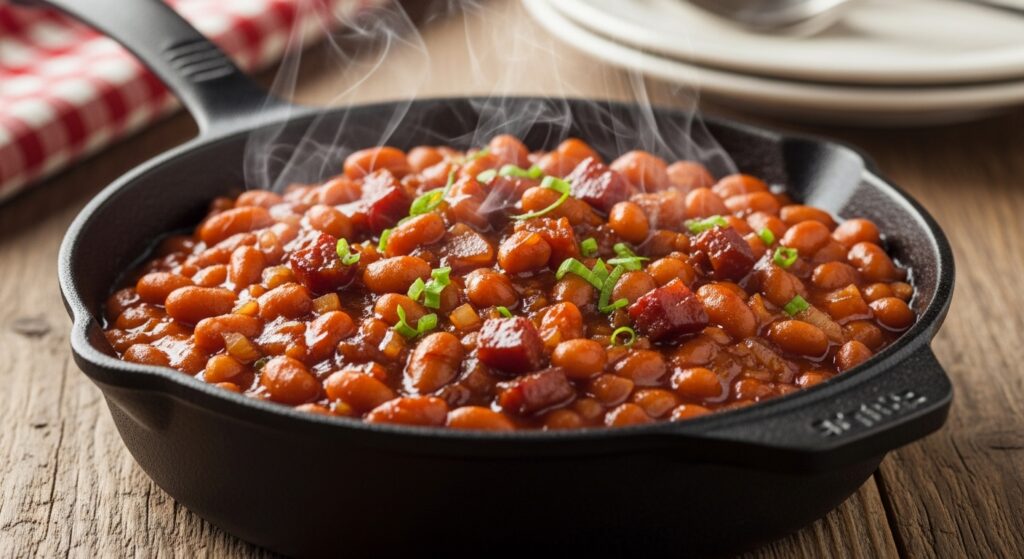
Serving Your Masterpiece
These beans are incredibly versatile. Serve them as the star of a hearty breakfast with eggs and toast, as the perfect side at a summer barbecue alongside grilled meats and cornbread, or as a comforting main course on a chilly evening. They are even better the next day, as the flavors continue to meld and deepen. Store leftovers in an airtight container in the refrigerator for up to 5 days, or freeze them for several months.
Conclusion: A Dish Worth the Wait
Making baked beans from scratch is more than a recipe; it’s a culinary ritual. It connects us to a tradition of slow, thoughtful cooking where time is the most valued ingredient. While a can offers convenience, this pot offers soul. It offers the deep satisfaction of creating something profoundly delicious from simple beginnings. So, clear your schedule, embrace the process, and prepare to experience baked beans not as a simple side dish, but as a rich, complex, and deeply rewarding culinary achievement. Your patience will be rewarded with a pot of beans that is, quite simply, legendary.