10 Christmas Lights Outside Ideas: Illuminate Your Home with Festive Magic
Outdoor Christmas lights transform ordinary homes into enchanting winter wonderlands that spread joy throughout the neighborhood and create lasting holiday memories. The right lighting design elevates your home’s curb appeal while expressing your personal style, whether you prefer classic elegance, whimsical displays, or modern minimalism. Strategic placement of lights highlights architectural features, creates depth and dimension, and ensures your decorations shine beautifully from every angle. From simple roofline outlines to elaborate animated displays, outdoor Christmas lighting offers endless creative possibilities that suit any budget and skill level. These ten inspiring ideas will help you design a stunning exterior light display that delights visitors, impresses passersby, and fills your home with holiday spirit from dusk until dawn.
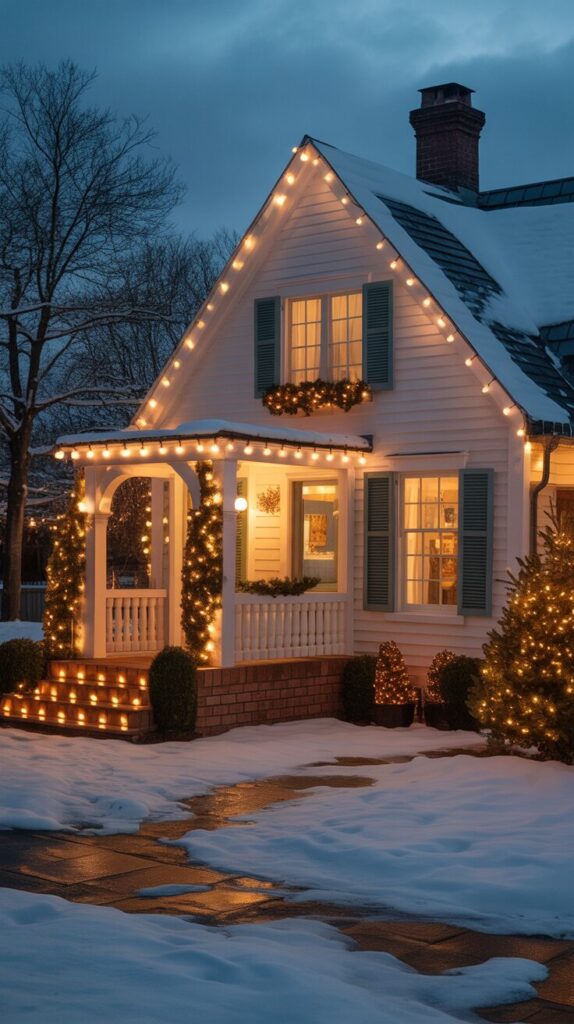
1. Classic Roofline and Eave Outlining
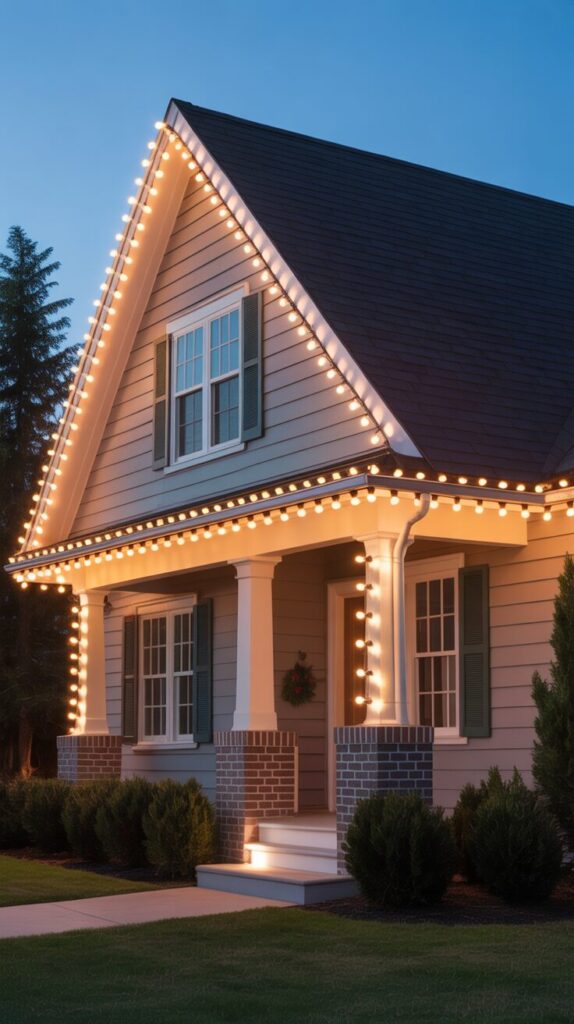
Define your home’s architectural silhouette by lining rooflines, eaves, and gables with traditional C9 or mini lights in warm white or multicolor strands. This timeless approach emphasizes your home’s structure while creating clean, professional-looking lines that are visible from the street and neighboring properties. Use clips designed specifically for gutters and shingles to secure lights without damaging surfaces, ensuring straight lines that follow rooflines precisely. Space lights consistently at 6-12 inch intervals depending on bulb size and desired brightness intensity for even illumination without dark gaps. Consider connecting lights to timers or smart plugs that automatically illuminate displays at dusk and turn them off late evening, conserving energy while ensuring reliable operation throughout the season.
2. Wrapped Tree Trunks and Branches
Transform yard trees into glowing focal points by spiraling string lights around trunks and wrapping them along major branches for dimensional, magical effects. Start at the tree base and work upward in tight spirals, using 100 lights per vertical foot of trunk for full coverage that creates solid columns of light. Extend lights onto larger branches, following their natural curves and creating organic patterns that look stunning against winter skies and falling snow. Choose warm white lights for elegant sophistication, colored lights for playful energy, or combine both on different trees for varied visual interest throughout your landscape. This technique works beautifully with deciduous trees that showcase light patterns through bare branches or evergreens that provide rich green backdrops enhancing illumination.
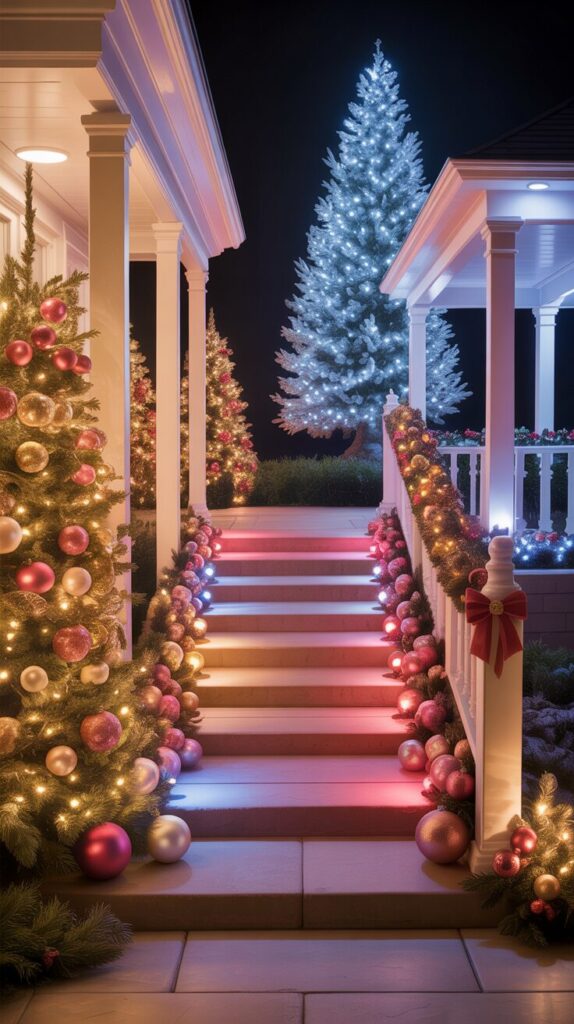
3. Illuminated Pathway and Walkway Borders
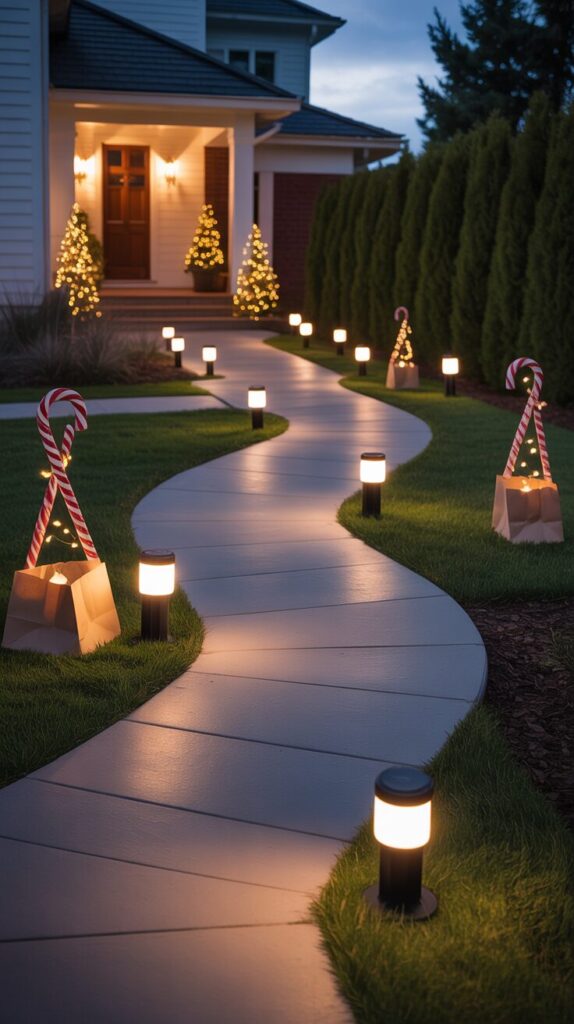
Guide guests safely to your entrance while creating welcoming ambiance by lining walkways, driveways, and garden paths with stake lights or luminarias. Install solar or electric pathway lights every 6-8 feet along both sides of walks to define edges clearly while providing practical illumination for safe navigation. Alternatively, create traditional luminaria displays using paper bags weighted with sand and battery-operated LED candles for flickering, romantic pathway lighting. Add candy cane stakes, miniature light-wrapped trees, or illuminated lawn ornaments between pathway lights for additional festive flair and dimensional interest. This layered approach combines functional safety lighting with decorative elements that make guests feel welcomed before they even reach your front door.
4. Window Frame and Door Surround Accents
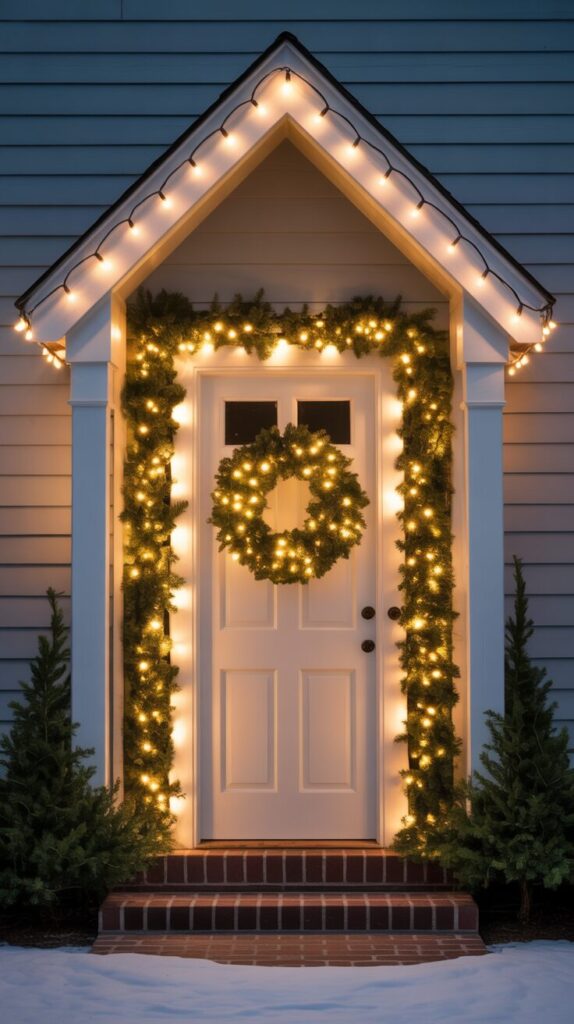
Highlight your home’s windows and entry doors with perfectly framed light borders that create charming, cottage-like warmth visible from both interior and exterior viewpoints. Outline window frames with icicle lights that drape naturally or mini lights secured with adhesive clips that follow frame edges precisely for clean, geometric patterns. Wrap garland around doorways and mailbox posts, then weave lights throughout greenery for integrated, layered texture that looks professionally designed and cohesive. Add wreaths with built-in lighting to centered positions above doorways or in window centers as coordinating focal points that tie the entire display together. This approach requires minimal materials while creating maximum visual impact, making it perfect for beginners or those preferring understated elegance over elaborate displays.
5. Animated Projection Light Shows

Create dynamic, ever-changing displays using outdoor projection lights that cast moving images, snowflakes, or holiday scenes across your home’s exterior walls. Position projectors 15-25 feet from projection surfaces to achieve proper image size and focus, adjusting angle and distance until patterns cover desired areas without distortion. Choose from static images like snowflakes and stars or animated sequences featuring Santa, reindeer, or swirling holiday patterns that capture attention and delight viewers. Combine projection lighting with traditional string lights and dimensional decorations for layered displays that offer both movement and depth throughout your property. These low-effort, high-impact solutions require minimal setup time compared to traditional lighting while delivering spectacular results that neighbors will admire throughout the season.
6. Lit Yard Ornaments and Inflatables Display
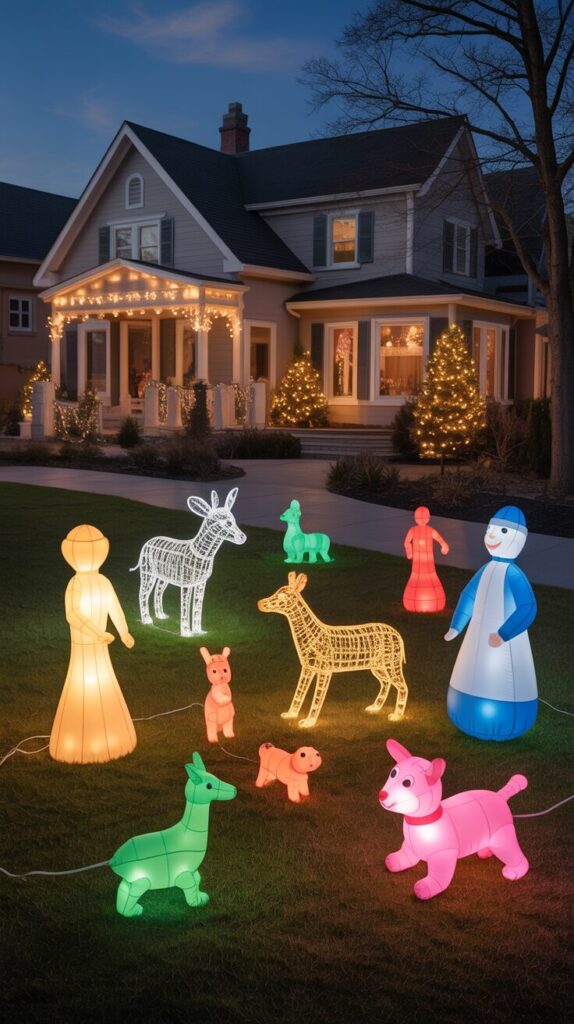
Populate your lawn with illuminated figures, wireframe animals, nativity scenes, or inflatable characters that create three-dimensional storytelling scenes throughout your property. Arrange figures in natural groupings that guide the eye through your yard—place larger pieces as focal points with smaller accents surrounding them. Secure inflatables and standing figures properly with stakes and tethers to withstand winter winds that can damage decorations or create safety hazards. Coordinate lighting colors and styles among various ornaments to maintain cohesive aesthetic rather than random, mismatched appearance that looks cluttered and chaotic. Balance the display across your yard’s visible areas so no single section appears overcrowded while others look sparse or neglected, creating harmonious overall composition.
7. Architectural Column and Pillar Wrapping
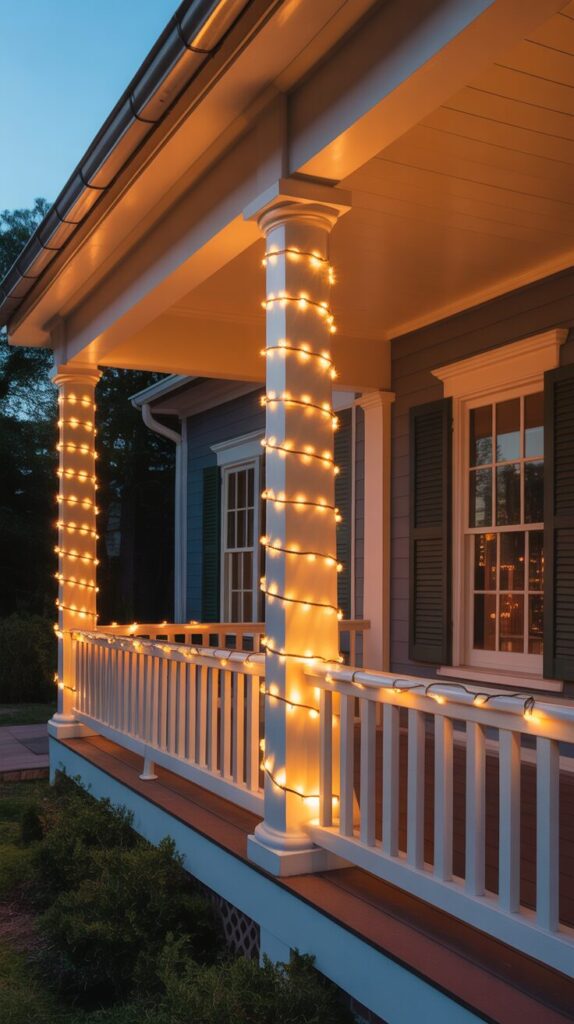
Emphasize porch columns, deck posts, and architectural pillars by spiraling them with rope lights or tightly wound string lights from base to capital. Use approximately 15-20 feet of lights per standard 8-foot column, wrapping tightly enough to create solid color columns without visible gaps between rotations. Secure lights with clear zip ties or outdoor-rated tape at top and bottom positions plus midway points to prevent sagging or unwinding during weather events. Extend the column effect by continuing lights across porch railings and balustrades, creating unified designs that integrate vertical and horizontal elements throughout covered areas. This technique particularly suits homes with prominent architectural features like Colonial columns or Craftsman-style porch posts that benefit from emphasis and illumination.
8. Cascading Icicle and Curtain Light Effects
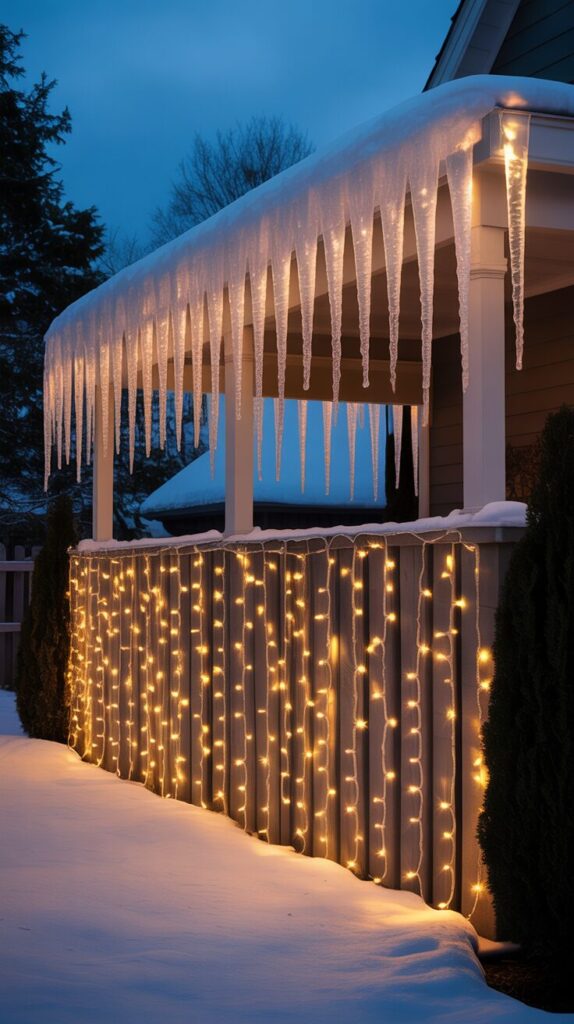
Install icicle lights along roof edges, porch overhangs, and fence tops to create the appearance of frozen dripping water and winter wonderland atmospheres. Choose lights with varying strand lengths for natural, organic icicle appearance rather than uniform lengths that look artificial and manufactured. Layer multiple rows of curtain lights across large blank wall surfaces or along extended fence lines to create dramatic light waterfalls visible from considerable distances. Consider programmable LED icicle lights offering chasing, twinkling, or fading effects that add movement and visual interest to static displays throughout evening hours. Ensure icicle strands hang freely without touching ground or landscape elements where moisture contact could create electrical hazards or accelerate bulb failure.
9. Color-Coordinated Theme Lighting Schemes
Design cohesive displays using carefully selected color combinations like classic red and green, elegant all-white, icy blue and white, or trendy rose gold and copper palettes. Commit to your chosen color scheme throughout all lighting elements—string lights, spotlights, pathway markers, and ornamental accents—for professional, intentional appearance rather than random assemblage. Use colored lights strategically to highlight specific features: cool whites for modern sophistication, warm whites for traditional elegance, or vibrant multicolors for playful, family-friendly energy. Incorporate non-lit decorative elements in coordinating colors like ribbons, bows, and ornaments that reinforce your lighting palette during daylight hours when lights aren’t illuminated. This thoughtful approach elevates simple lighting into curated design that reflects personal style while creating memorable visual impact throughout your neighborhood.
10. Landscape and Garden Bed Uplighting
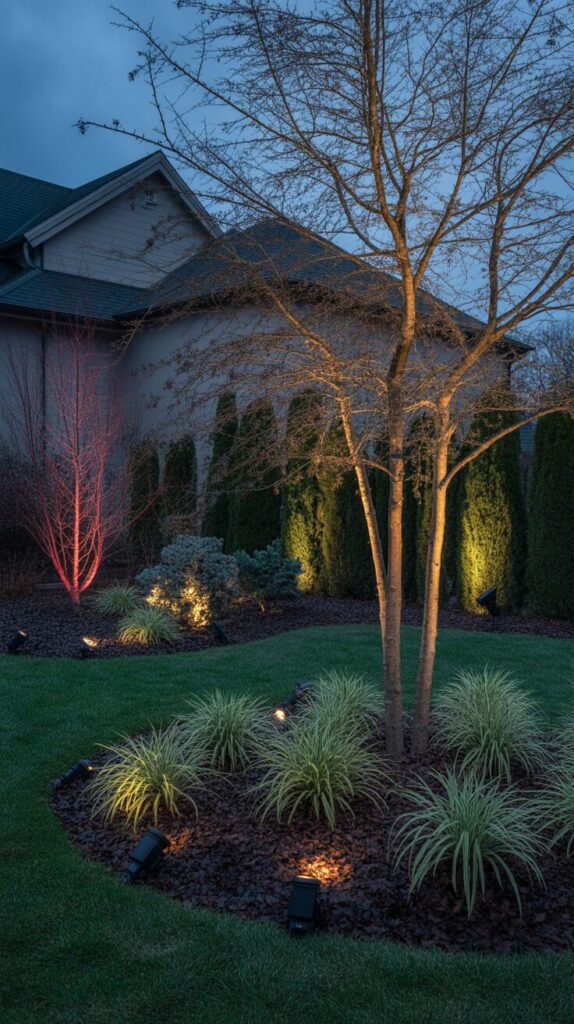
Install ground-level spotlights and stake lights throughout landscape beds to illuminate trees, shrubs, and architectural features from below for dramatic shadowing and depth. Position uplights at tree bases angling upward to cast branches and foliage in dramatic relief against house walls or night sky for theatrical effects. Highlight evergreen shrubs, decorative grasses, and winter-interest plants with colored or white spotlights that transform ordinary landscaping into extraordinary focal points throughout your property. Use path lights and well lights to create layers of illumination at various heights, preventing flat, one-dimensional appearance common in displays using only overhead lighting. This professional lighting technique adds sophistication and depth that distinguishes your display from typical roofline-only decorations while celebrating your landscape’s natural beauty even during winter dormancy.
Essential Tips for Outdoor Christmas Lighting Success
Safety and Electrical Considerations: Use only outdoor-rated lights, extension cords, and electrical connections specifically designed for exterior use and weather exposure to prevent electrical hazards. Avoid overloading circuits by calculating total wattage—most household circuits handle 15 amps or approximately 1,800 watts before breakers trip. Install GFCI (Ground Fault Circuit Interrupter) outlets for outdoor connections to immediately cut power if moisture creates dangerous electrical conditions. Keep all electrical connections elevated off ground and protected from standing water, snow accumulation, and direct precipitation that can cause shorts or shock hazards.
Planning and Layout Design: Sketch your home’s exterior and mark intended light placement before purchasing materials to accurately calculate strand lengths and quantities needed. Take measurements of rooflines, window frames, walkways, and trees to determine exact footage requirements, then add 10-15% extra for connections and adjustments. Consider viewing angles from street, sidewalk, and neighboring properties to ensure displays look attractive from all perspectives rather than focusing only on straight-on views. Create balance and symmetry in your design by repeating elements on both sides of your home or intentionally designing asymmetric displays that still feel visually harmonious.
Installation Techniques and Tools: Invest in proper clips, hooks, and fasteners designed for specific surfaces like shingles, gutters, brick, or siding rather than using nails or staples that damage surfaces. Use outdoor-rated extension cords in appropriate lengths to reach outlets without excessive slack creating tripping hazards or tight connections causing stress on plugs. Test all lights before installation to identify non-working strands that can be replaced before spending time hanging them in difficult-to-access locations. Work during daylight hours when visibility is optimal, and use stable ladders with helpers to ensure safety when accessing roof edges and tall trees.
Weather Protection and Winterization: Secure lights thoroughly with multiple attachment points to prevent wind damage that can tangle strands, break bulbs, or pull down entire sections during storms. Protect electrical connections with waterproof covers, electrical tape, or plastic bags secured with rubber bands to prevent moisture infiltration that causes failures. Remove heavy snow accumulation from light strands promptly to prevent weight stress that breaks wires or pulls down installations from mounting points. Store lights properly after the season by wrapping them around cardboard or specialized storage reels to prevent tangling and prolong lifespan for future years.
Energy Efficiency and Smart Controls: Switch to LED lights that use 75-80% less energy than traditional incandescent bulbs while lasting significantly longer and generating minimal heat that reduces fire risks. Install timers, light sensors, or smart plugs that automate your display schedule, ensuring lights operate only during desired evening hours rather than wasting electricity during daytime. Consider solar-powered options for pathway lights, spotlights, and accent lighting in areas distant from electrical outlets to reduce wiring complexity and eliminate operating costs. Program smart controllers to create varied lighting patterns, dimming schedules, or special effects that keep displays interesting throughout the extended holiday season.
Maintenance and Troubleshooting: Inspect displays regularly throughout the season to identify burned-out bulbs, damaged strands, or loose connections that diminish overall appearance and can create safety hazards. Replace faulty bulbs promptly since dead bulbs can cause entire strand sections to fail in series-wired light sets, creating progressively larger dark areas. Keep spare bulbs, fuses, and replacement strands on hand for quick repairs that maintain display quality without requiring additional shopping trips during busy holiday periods. Document your setup with photos and notes about light quantities, placement strategies, and what worked well to streamline installation in subsequent years and build on successful designs.
Conclusion
Outdoor Christmas lighting transforms your home into a festive beacon that spreads holiday cheer throughout your neighborhood while creating cherished family traditions and memories. These ten diverse lighting ideas demonstrate that spectacular displays adapt to any home style, budget, or skill level, from simple elegant outlines to elaborate animated wonderlands. The key to successful outdoor lighting lies in careful planning, proper installation techniques, and attention to safety considerations that protect both your property and your family throughout the season. Whether you choose classic roofline lights, modern projection displays, or elaborate yard scenes, your outdoor lighting design reflects your personal holiday spirit and welcomes all who pass by to share in the season’s joy. Start planning your display early, gather quality materials, and begin creating the outdoor lighting showcase that will delight your family and neighbors throughout this holiday season and for many years to come.
Frequently Asked Questions
When should I put up outdoor Christmas lights? Most people install outdoor lights between Thanksgiving and early December, though you can begin earlier if weather permits and enthusiasm strikes. Starting early allows more time to enjoy your display throughout the extended holiday season while avoiding last-minute rush and cold weather installation challenges.
How many lights do I need for my house? Estimate 100 lights per linear foot of roofline for full coverage, though this varies based on bulb size, spacing preferences, and desired brightness levels. Measure all areas you plan to decorate, then calculate totals and add 10-15% extra for connections, overlaps, and replacements of defective strands.
Can I connect multiple light strands together? Most light strings specify maximum connection quantities (typically 3-5 strands for LED lights, fewer for incandescent) to prevent circuit overload and fire hazards. Always check manufacturer specifications on packaging and never exceed recommended limits regardless of circuit capacity available at the outlet.
Should I use LED or incandescent lights? LED lights offer superior energy efficiency, longer lifespan, and safer operation with minimal heat generation, making them the better choice for most applications. While initially more expensive, LEDs save money through reduced electricity costs and last 10-25 times longer than traditional incandescent options.
How do I prevent lights from getting tangled when storing? Wrap each strand around cardboard pieces, specialized storage reels, or your hand and elbow before securing with twist ties or velcro straps. Store wrapped strands in labeled plastic containers with dividers separating different colors and lengths for easy identification and tangle-free retrieval next season.