Perfect Oatmeal Chocolate Chip Cookies Recipe: Easy Homemade Recipe
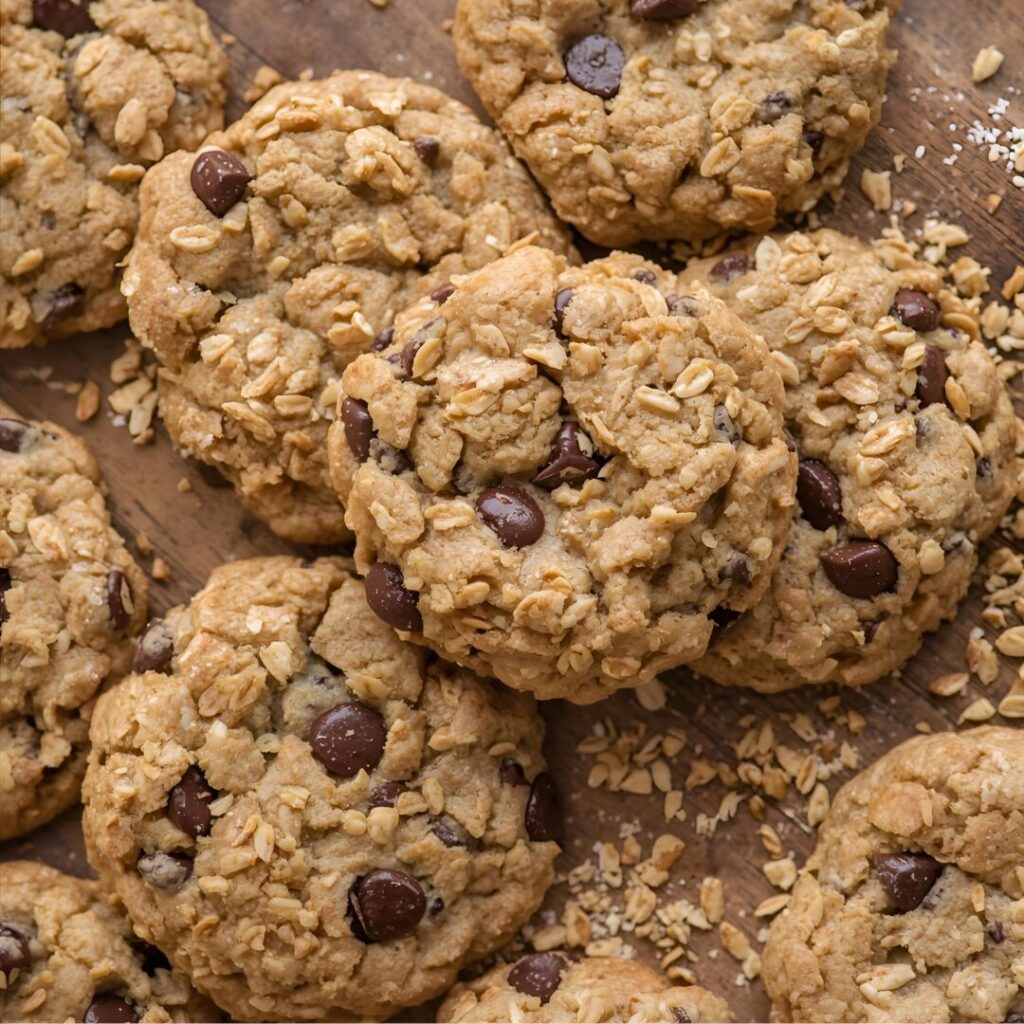
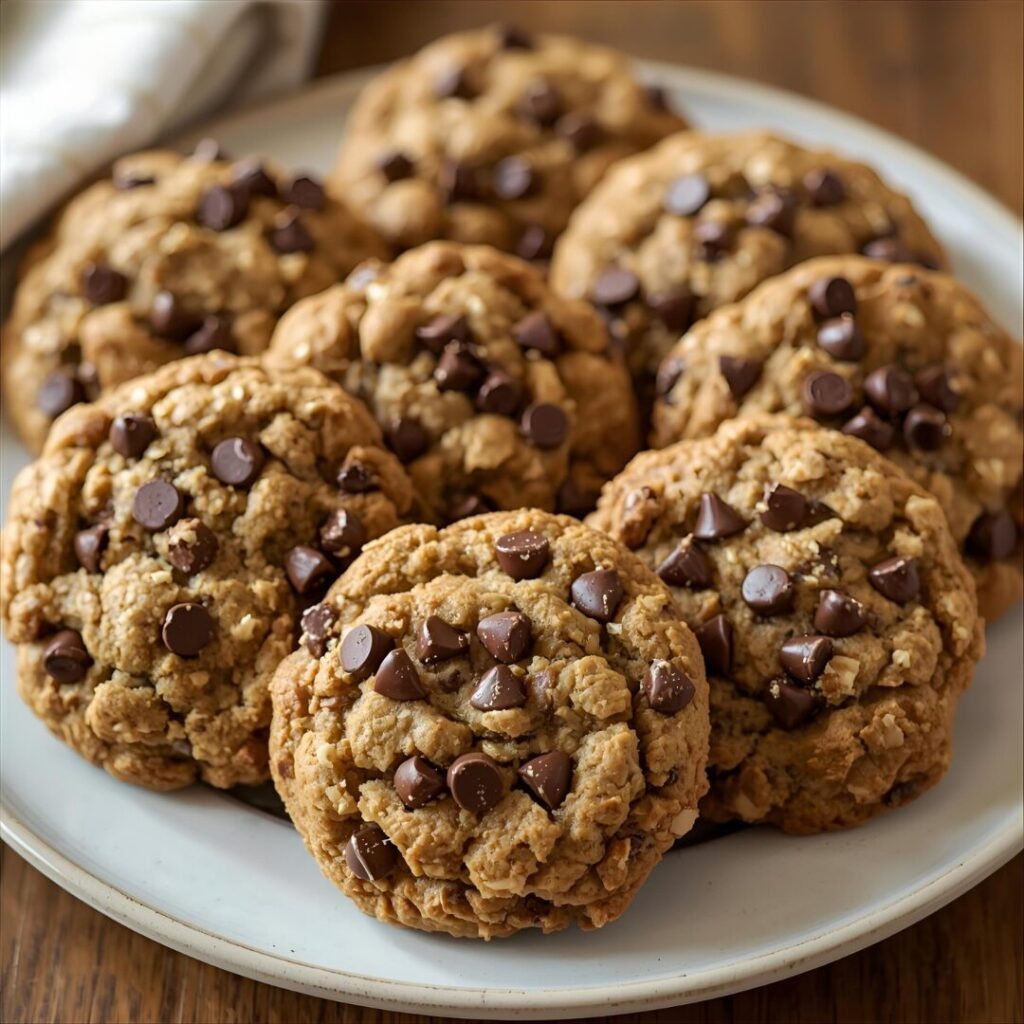
Imagine biting into a warm cookie with crispy golden edges and a soft, chewy center packed with melty chocolate chips and wholesome oats. That’s exactly what you’ll get with this simple oatmeal chocolate chip cookie recipe. Whether it’s your first time baking or you’re a kitchen pro, this recipe works every single time without fail.
What sets these cookies apart is their incredible texture. The combination of butter and brown sugar creates moisture that keeps them soft for days, while the oats add a satisfying bite that regular chocolate chip cookies just can’t match. Plus, they’re made with everyday ingredients you likely have sitting in your pantry right now.
These cookies are perfect for any occasion—pack them in lunch boxes, serve them at gatherings, or simply enjoy them with your afternoon coffee. The best part? They’re ready in under 30 minutes from start to finish.
Quick Recipe Information
| Detail | Information |
|---|---|
| Preparation Time | 12 minutes |
| Baking Time | 11 minutes |
| Total Time | 23 minutes |
| Servings | 30 cookies |
| Skill Level | Beginner Friendly |
| Diet Type | Vegetarian |
What Makes This Recipe Special
This isn’t just another cookie recipe—it’s been perfected through trial and error to give you the absolute best results. Here’s what makes it stand out:
The ratio of ingredients has been carefully balanced to create cookies that are neither too flat nor too thick. The brown sugar to white sugar proportion ensures the perfect chewiness without being overly soft. The amount of oats gives you that hearty texture without making the cookies dry or crumbly.
Additionally, this recipe is incredibly versatile. Once you master the basic version, you can customize it endlessly by adding nuts, swapping chocolate types, or incorporating dried fruits. It’s essentially your foundation recipe for unlimited cookie variations.
Ingredients List
For the Cookie Base
- 1½ cups all-purpose flour
- 1 teaspoon baking soda
- 1 teaspoon cinnamon powder
- ½ teaspoon salt
- 1 cup softened butter (unsalted)
- ¾ cup brown sugar (packed)
- ½ cup white sugar
- 2 eggs (room temperature)
- 2 teaspoons vanilla extract
- 3 cups rolled oats (old-fashioned style)
For the Mix-Ins
- 1½ cups semi-sweet chocolate chips
- Optional: ¾ cup chopped nuts (walnuts or pecans work great)
Important Ingredient Tips
About the Butter: Room temperature butter is crucial. It should be soft enough to press with your finger but not greasy or melted. If your butter is too cold, the cookies won’t spread properly. Too warm, and they’ll spread too much.
Choosing Your Oats: Always use old-fashioned rolled oats for this recipe. Quick oats turn mushy during baking, and steel-cut oats stay too hard. The rolled oats provide the perfect texture and hold their shape beautifully.
Sugar Matters: The combination of brown and white sugar isn’t random. Brown sugar adds moisture and creates chewiness, while white sugar helps the edges get crispy. Don’t skip either one if you want the ideal texture.
Chocolate Choices: While semi-sweet is classic, you can experiment with dark chocolate for richness, milk chocolate for sweetness, or even a mix of all three for complexity.
Step-by-Step Baking Instructions
Getting Started
Start by setting your oven to 350°F and positioning the rack in the middle. While it heats up, line two baking sheets with parchment paper. This prevents sticking and ensures even browning on the bottom of your cookies.
Take out all your ingredients and let the eggs and butter come to room temperature if you haven’t already. Having everything ready before you start mixing makes the process smooth and enjoyable.
Making the Dough
Step 1: Grab a medium bowl and whisk together your flour, baking soda, cinnamon, and salt. Whisking instead of just stirring helps distribute everything evenly, which means consistent flavor in every cookie. Set this aside for now.
Step 2: In your large mixing bowl, add the softened butter along with both sugars. Using an electric mixer, beat them together on medium speed for about 3 minutes. You’re looking for a light, fluffy mixture that’s pale in color. This process is called creaming, and it’s what gives your cookies their wonderful texture.
Step 3: Add your eggs one at a time to the butter mixture, beating well after adding each one. Then pour in the vanilla extract and mix until everything looks smooth and well combined. The mixture might look slightly separated at this point, but that’s completely normal.
Step 4: Turn your mixer to low speed and slowly add the flour mixture you prepared earlier. Mix just until you can’t see any dry flour anymore—this usually takes about 20 seconds. Stop mixing as soon as the flour disappears. Overmixing at this stage makes tough cookies, and nobody wants that.
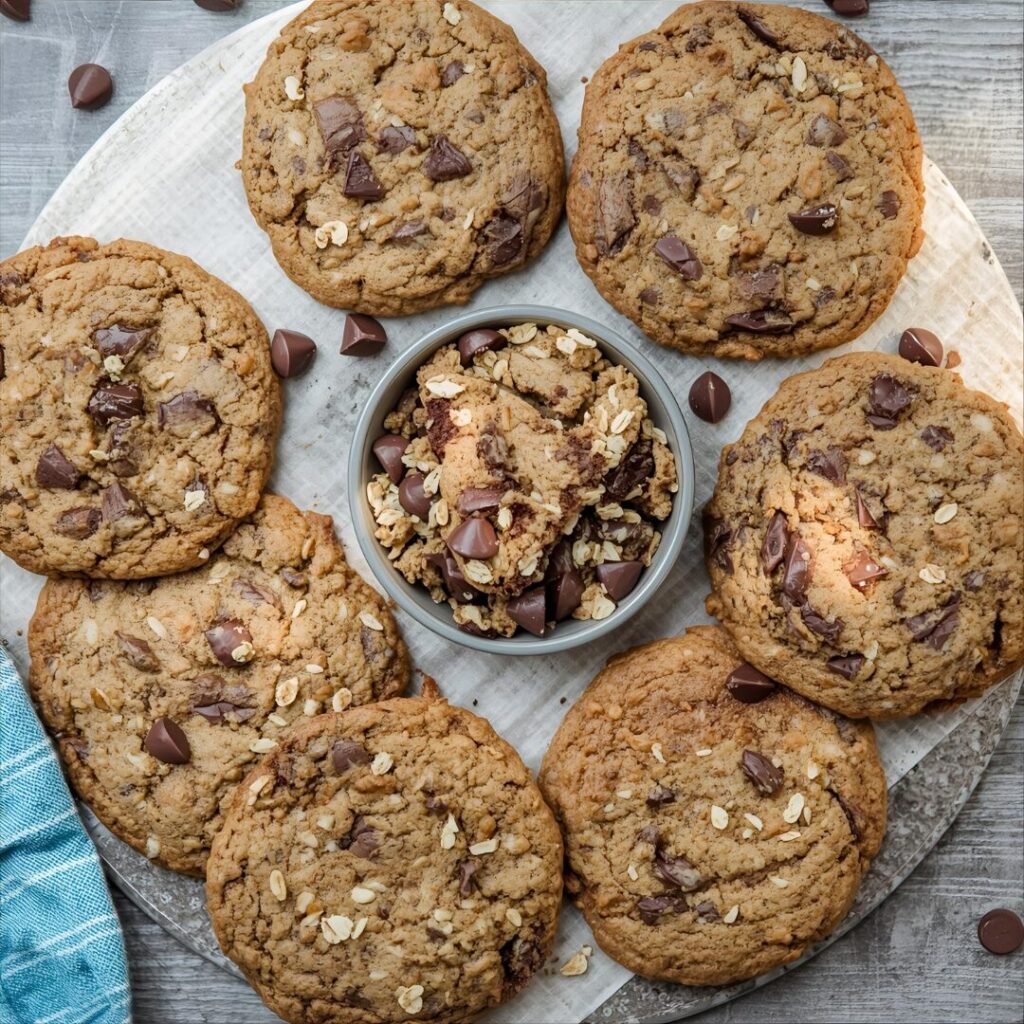
Step 5: Now comes the fun part. Switch to a wooden spoon or spatula and fold in your oats by hand. Make sure they’re distributed evenly throughout the dough. Then add your chocolate chips (and nuts if you’re using them), stirring until they’re spread throughout.
Shaping and Baking
Step 6: Using a spoon or cookie scoop, drop rounded portions of dough onto your prepared baking sheets. Leave about 2 inches of space between each cookie—they’ll spread a bit while baking. If you want perfectly uniform cookies, roll each portion into a ball between your palms before placing on the sheet.
Step 7: Place your baking sheet in the preheated oven and bake for 10-12 minutes. Here’s the secret to perfect cookies: take them out when the edges look golden and set, but the centers still look slightly soft and puffy. They might even look a tiny bit underdone in the middle. Trust me on this—they’ll continue cooking on the hot pan after you take them out.
Step 8: Let the cookies sit on the baking sheet for 5 full minutes without moving them. This resting time is critical. The cookies are still baking from the residual heat, and they need this time to firm up enough to be moved. After 5 minutes, transfer them carefully to a cooling rack using a spatula.
Nutrition Facts Per Cookie
| Nutrient | Amount |
|---|---|
| Calories | 155 |
| Fat | 7g |
| Carbohydrates | 21g |
| Fiber | 1g |
| Sugar | 11g |
| Protein | 2g |
| Sodium | 85mg |
Professional Baking Tips
Temperature Control
Getting your ingredient temperatures right makes a huge difference. Room temperature butter creams properly with sugar, creating air pockets that make cookies tender. Cold butter won’t incorporate well, and melted butter leads to flat, greasy cookies.
For eggs, cold ones can cause your butter mixture to seize up and look curdled. If you forget to take them out in advance, just place them in a bowl of warm (not hot) water for 5 minutes.
Your oven temperature matters too. Invest in an oven thermometer if you haven’t already. Many ovens run 25 degrees hotter or cooler than the dial says, which can ruin your results.
Achieving Perfect Texture
The single most important tip for chewy cookies is to underbake them slightly. When you remove cookies from the oven, they should look almost—but not quite—done. The centers should still look soft and even a bit wet. As they cool on the pan, they’ll set perfectly while maintaining that chewy center.
If you prefer thicker cookies that don’t spread as much, chill your dough in the refrigerator for 30 minutes before baking. Cold dough takes longer to spread in the oven, resulting in puffier cookies.
Measuring Correctly
Incorrect flour measurement is the number one reason cookies fail. Too much flour makes them dry and cakey. The proper way to measure is to spoon flour into your measuring cup and level it off with a knife. Never scoop directly from the bag, as this packs way too much flour into the cup.
For brown sugar, pack it firmly into the measuring cup. It should hold its shape when you turn it out. This ensures you’re getting the right amount of moisture and flavor.
Delicious Recipe Variations
Flavor Twists
Peanut Butter Lovers: Reduce butter to ¾ cup and add ½ cup of creamy peanut butter. The result is a richer cookie with nutty undertones that complement the chocolate perfectly.
Dark Chocolate Dream: Swap regular chocolate chips for dark chocolate (60% cacao or higher) and add a sprinkle of sea salt on top before baking. The salt enhances the chocolate flavor beautifully.
Fruit and Nut: Replace one cup of chocolate chips with dried cranberries or cherries, and add ½ cup of chopped pecans. This creates a more sophisticated cookie that’s less sweet.
Coconut Paradise: Mix in 1 cup of shredded coconut along with your chocolate chips. Toast the coconut first for extra flavor depth.

Espresso Enhancement: Add 1 tablespoon of instant espresso powder to your dry ingredients. Coffee intensifies chocolate flavor without making the cookies taste like coffee.
Healthier Options
Whole Grain Version: Replace one cup of all-purpose flour with whole wheat flour. This adds fiber and nutrients while maintaining good texture.
Lower Sugar: Reduce the white sugar to ¼ cup instead of ½ cup. The cookies will be less sweet but still delicious, allowing the chocolate flavor to shine through more.
Oil Instead of Butter: Use ¾ cup of coconut oil in place of butter for a dairy-free option. Make sure it’s at room temperature (solid but soft).
Storage and Preservation
Keeping Cookies Fresh
Store your completely cooled cookies in an airtight container at room temperature. They’ll stay fresh and soft for up to one week. Here’s a baker’s secret: add a slice of sandwich bread to the container. The cookies will absorb moisture from the bread, staying soft and chewy longer. Replace the bread slice every few days.
Never store cookies while they’re still warm, as the trapped steam will make them soggy. Make sure they’re completely cool to the touch first.
Freezing for Later
Freezing Baked Cookies: Once completely cool, layer cookies between sheets of parchment paper in a freezer-safe container. They’ll keep for 3 months. To serve, let them thaw at room temperature for 20 minutes, or warm in the microwave for 10 seconds.
Freezing Raw Dough: This is my favorite method for always having fresh cookies ready. Shape all your dough into balls, place them on a baking sheet, and freeze until solid (about 90 minutes). Then transfer the frozen dough balls to a freezer bag. When you want fresh cookies, bake them straight from frozen, just add 2 minutes to the baking time.
Common Problems and Solutions
Cookies Spreading Too Thin
This happens when butter is too soft or melted, or when dough is too warm. Make sure your butter is just softened, not greasy. If your kitchen is hot, refrigerate the dough for 20-30 minutes before baking. Also check that you’re measuring flour correctly—too little flour causes spreading.
Cookies Too Thick and Cakey
Usually caused by too much flour or overmixing the dough. Use the spoon-and-level method for measuring flour, and mix only until ingredients are just combined. You can also gently press down on dough balls before baking to encourage spreading.
Cookies Turning Out Hard
The main culprit is overbaking. Remember to remove cookies when centers still look slightly soft. They firm up as they cool. Also ensure you’re not using too much flour, which creates dry, hard cookies.
Uneven Baking Results
Rotate your baking sheet halfway through baking time. Every oven has hot spots that cause uneven browning. Also make sure all cookies on the sheet are the same size—use a cookie scoop for consistency.
Your Questions Answered
What if I only have quick oats?
Quick oats can work in a pinch, but your cookies will have a different texture—softer and less chewy. If using quick oats, reduce the amount to 2½ cups instead of 3 cups to avoid a mushy texture.
Can I make these without a mixer?
Absolutely! You can cream the butter and sugar by hand using a wooden spoon, though it requires some arm strength. Mix vigorously for about 5 minutes until the mixture looks light and fluffy.
Why do my cookies look perfect in the oven but deflate when cooling?
This usually means they needed another minute or two of baking. The structure hasn’t set enough to hold its shape. Next time, bake for one additional minute.
How do I make my cookies more chewy?
Use more brown sugar and less white sugar (try 1 cup brown and ¼ cup white). Also, underbake slightly and let them cool completely on the baking sheet before moving.
Can I substitute margarine for butter?
You can, but the flavor and texture won’t be quite as good. Butter provides better flavor and helps create the right texture. If using margarine, choose stick margarine rather than the spreadable kind.
What’s the best way to measure oats?
Spoon oats into your measuring cup and level off. Don’t pack them down. Oats should be measured loosely for accurate results.
My chocolate chips always sink to the bottom. How do I fix this?
Toss your chocolate chips with 1 tablespoon of flour before adding them to the dough. The flour coating helps them stay suspended throughout the cookie.
Can I add multiple mix-ins?
Yes! Just keep the total mix-ins to about 2 cups. For example, try 1 cup chocolate chips, ½ cup nuts, and ½ cup dried fruit for a loaded cookie.
Final Thoughts
Making oatmeal chocolate chip cookies from scratch is one of those simple pleasures that brings joy to both the baker and everyone lucky enough to taste them. This recipe takes basic pantry ingredients and transforms them into something truly special—cookies that are crispy on the edges, chewy in the middle, and loaded with chocolate in every bite.
The beauty of this recipe lies in its reliability and flexibility. Follow it exactly for perfect results, or use it as your canvas for creativity by trying different mix-ins and flavor combinations. Either way, you’ll end up with cookies that taste far better than anything you can buy at a store.
Remember the key points: use room temperature ingredients, don’t overmix your dough, and remove cookies from the oven when they look slightly underdone. Master these basics, and you’ll be making perfect cookies every single time.
Now grab your mixing bowl and get baking—your kitchen is about to smell absolutely amazing!