Sizzling Philly Cheese Steak Sandwich with Savory Mushrooms – A Flavor Explosion!
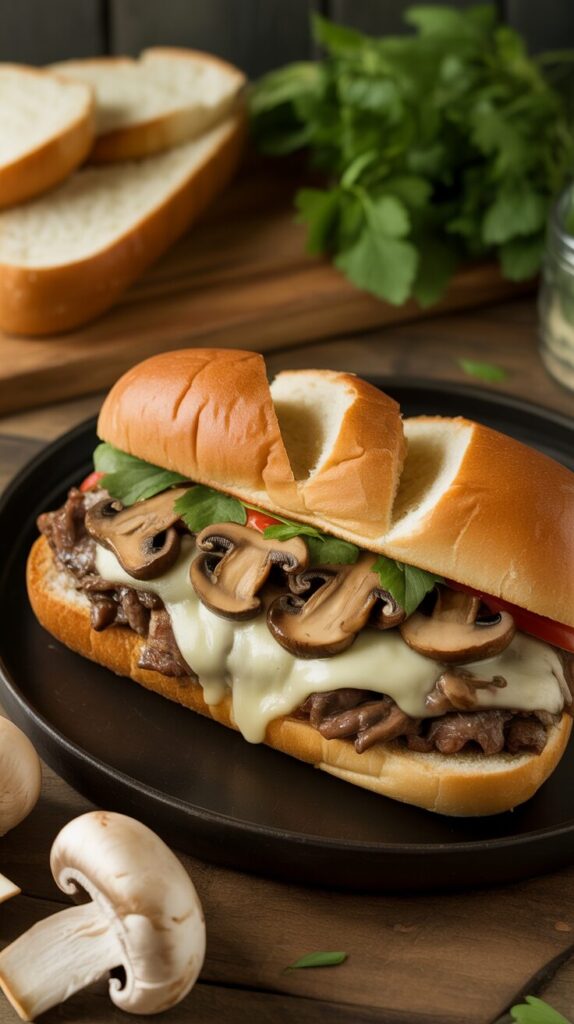
There’s something absolutely magical about a properly made Philly cheese steak—the sizzle of thinly sliced steak hitting a hot griddle, the aroma of caramelizing onions, the sight of melted cheese cascading over tender meat, all nestled inside a perfectly toasted hoagie roll. And when you add savory, golden-brown mushrooms to the mix? You’ve just elevated this iconic sandwich from legendary to absolutely mind-blowing. This isn’t just a sandwich—it’s an experience, a flavor explosion that hits all the right notes with every single bite.
Whether you’ve been lucky enough to taste an authentic Philly cheese steak on the streets of Philadelphia or you’ve only dreamed about it, this recipe brings that authentic experience straight to your kitchen. We’re talking about restaurant-quality results using techniques that actually work at home, with tips from sandwich masters who’ve perfected this art over decades. The addition of savory mushrooms isn’t traditional, but it adds an incredible umami depth and meaty texture that makes this version absolutely irresistible—even Philly purists secretly love it.
The Legend of the Philly Cheese Steak
Before we dive into cooking, let’s appreciate what makes this sandwich so special. The Philly cheese steak was born in Philadelphia in the 1930s when Pat Olivieri, a hot dog vendor, decided to grill some beef and put it on an Italian roll. A cab driver smelled it, wanted one, and the legend was born. Pat’s King of Steaks and Geno’s Steaks became the most famous purveyors, and debates have raged for decades about the “proper” way to make one.
Here’s what we know for sure: a great Philly cheese steak requires thinly sliced ribeye, a soft yet sturdy hoagie roll, and melted cheese (whether Cheez Whiz, provolone, or American is “correct” depends on who you ask—they’re all delicious). Everything else—onions, peppers, mushrooms—is optional but highly encouraged. Our version honors the spirit of the original while adding those incredible mushrooms that create layers of savory, umami-rich flavor.
Ingredients You’ll Need
For the Steak
The foundation of any great cheese steak:
- 1.5 lbs ribeye steak – The gold standard for Philly cheese steaks (more on alternatives below)
- 2 tablespoons vegetable oil – High smoke point for proper searing
- 1 teaspoon salt – Essential seasoning
- ½ teaspoon black pepper – Adds depth
- 1 teaspoon garlic powder – Subtle savory note
- ½ teaspoon onion powder – Background flavor
For the Vegetables
Building those layers of flavor:
- 2 large onions, thinly sliced – Yellow or white onions work best
- 8 oz mushrooms, sliced – Baby bella (cremini) are ideal, white button mushrooms work too
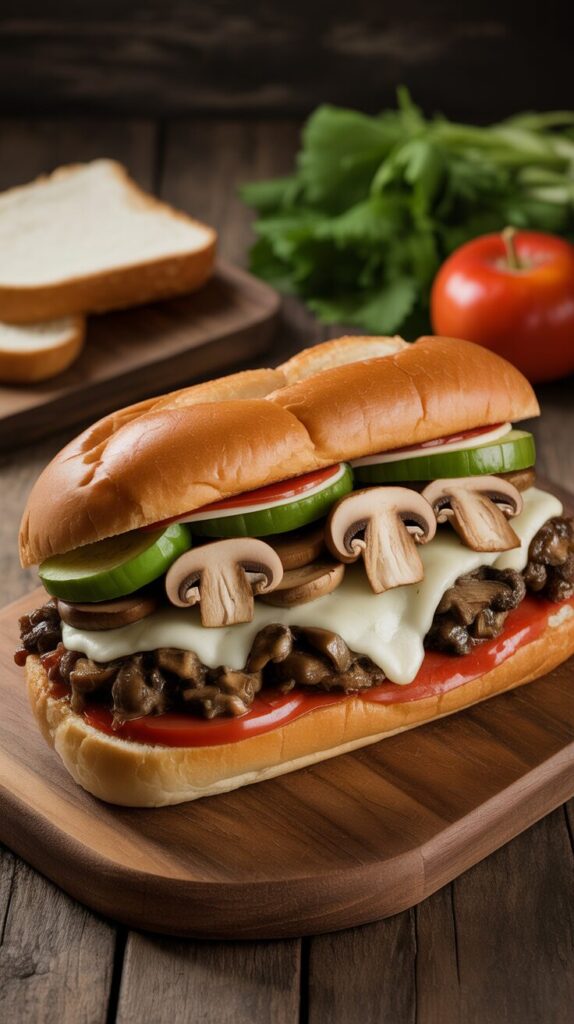
- 1 large green bell pepper, thinly sliced – Optional but traditional
- 2 tablespoons butter – For cooking the vegetables with extra richness
- 4 cloves garlic, minced – Because garlic makes everything better
- Salt and pepper to taste – For seasoning the vegetables
For Assembly
Bringing it all together:
- 4 hoagie rolls (6-8 inches long) – Look for Amoroso rolls if you can find them, or any soft Italian hoagie
- 8-12 slices provolone cheese – Or 8 slices American cheese, or ½ cup Cheez Whiz (your choice!)
- 2 tablespoons butter – For toasting the rolls
- Mayo – Optional but many Philly locals swear by it
Optional Additions
For those who like to customize:
- Hot cherry peppers – For heat and tang
- Banana peppers – Milder pickled flavor
- Jalapeños – Fresh heat
- Ketchup – Controversial but some people love it
- Hot sauce – Extra kick
Choosing and Preparing Your Steak
The Best Cut
Ribeye is king for Philly cheese steaks. The marbling provides incredible flavor and keeps the meat tender even when sliced thin and cooked hot and fast. The fat renders during cooking, basting the meat and creating that signature richness.
Alternative cuts that work:
- Top sirloin – Leaner but still flavorful, more budget-friendly
- Sirloin tip – Good option if you can’t find ribeye
- Skirt steak – Has good flavor but can be chewy if not sliced properly
- Chuck eye – The “poor man’s ribeye,” actually excellent for this
Avoid: Lean cuts like eye of round or bottom round—they’ll be tough and dry.
The Slicing Secret
The key to authentic Philly cheese steak is paper-thin slices—we’re talking 1/16 inch or thinner. Here’s how to achieve it:
Freeze the meat first: Place your steak in the freezer for 30-45 minutes until it’s firm but not frozen solid. This makes slicing dramatically easier.
Use a sharp knife: A very sharp chef’s knife or slicing knife is essential. Dull knives will tear the meat.
Slice against the grain: Look for the direction of the muscle fibers and cut perpendicular to them. This shortens the fibers and creates tenderness.
Keep slices consistent: Try to make all slices the same thickness so they cook evenly.
Pro tip: If you’re struggling to slice thin enough, ask your butcher to slice the ribeye for you on their meat slicer. Many will do this for free or a small fee, and you’ll get perfect, consistent slices.
Pre-Cooking Prep
Once sliced, place the meat in a bowl and season with:
- Salt
- Black pepper
- Garlic powder
- Onion powder
Toss to coat evenly. Let it sit at room temperature for 15-20 minutes while you prep the vegetables. This allows the seasonings to penetrate and takes the chill off the meat for more even cooking.
Preparing the Vegetables
Slicing Technique
Onions: Cut in half through the root, peel, then slice into thin half-moons about ¼ inch thick. You want them thin enough to caramelize quickly but thick enough to maintain some texture.
Mushrooms: Slice about ¼ inch thick. Don’t slice too thin or they’ll disappear; don’t slice too thick or they won’t cook through properly.
Bell peppers: Remove core and seeds, then slice into thin strips about ¼ inch wide.
The Cooking Order
Vegetables should be cooked first and kept warm while you cook the meat. Here’s why this order matters: the meat cooks very quickly (1-2 minutes) and shouldn’t sit around waiting. The vegetables take longer and can sit for a few minutes without suffering.
Step-by-Step Cooking Instructions
Cooking the Mushrooms
Start with the mushrooms because they release the most moisture and take the longest:
Step 1: Heat a large skillet or griddle over medium-high heat. Add 1 tablespoon of butter.
Step 2: Once the butter melts and stops foaming, add all the sliced mushrooms. Don’t stir immediately! Let them sit for 2-3 minutes to develop a golden-brown sear on one side.
Step 3: Stir and continue cooking for another 4-5 minutes until the mushrooms are golden brown, have released their moisture, and that moisture has mostly evaporated. The mushrooms should look caramelized and smell incredible.
Step 4: Season with salt and pepper, then transfer to a bowl and set aside.
Caramelizing the Onions
Nothing says Philly cheese steak like properly caramelized onions:
Step 1: In the same skillet, add another tablespoon of butter and the sliced onions.
Step 2: Cook over medium heat, stirring occasionally, for 10-15 minutes. The onions should become soft, golden, and sweet. Don’t rush this—proper caramelization takes time and develops incredible flavor.
Step 3: If using bell peppers, add them about 5 minutes into cooking the onions so they soften but maintain some texture.
Step 4: In the last minute of cooking, add the minced garlic. Stir until fragrant, about 30 seconds.
Step 5: Season with salt and pepper, then transfer to the bowl with the mushrooms. Keep warm.
Cooking the Steak
This is where the magic happens—the sizzle, the sear, the transformation:
Step 1: Crank the heat to high and add 2 tablespoons of vegetable oil to your skillet or griddle. Let it get very hot—you want it smoking slightly.
Step 2: Working in batches if necessary (don’t overcrowd!), add the seasoned steak slices in a single layer. Let them sit undisturbed for 30-45 seconds to develop a sear.
Step 3: Using a metal spatula or two, chop and toss the meat on the griddle. This breaks it into smaller pieces and helps it cook evenly. The meat should sizzle aggressively—this is that signature Philly cheese steak sound!
Step 4: Continue cooking and tossing for another 1-2 minutes until the meat is just cooked through with some caramelized edges. Don’t overcook—you want it tender, not tough.
Step 5: Push the meat into 4 separate piles (if making 4 sandwiches) on the griddle or keep it all together and divide later.
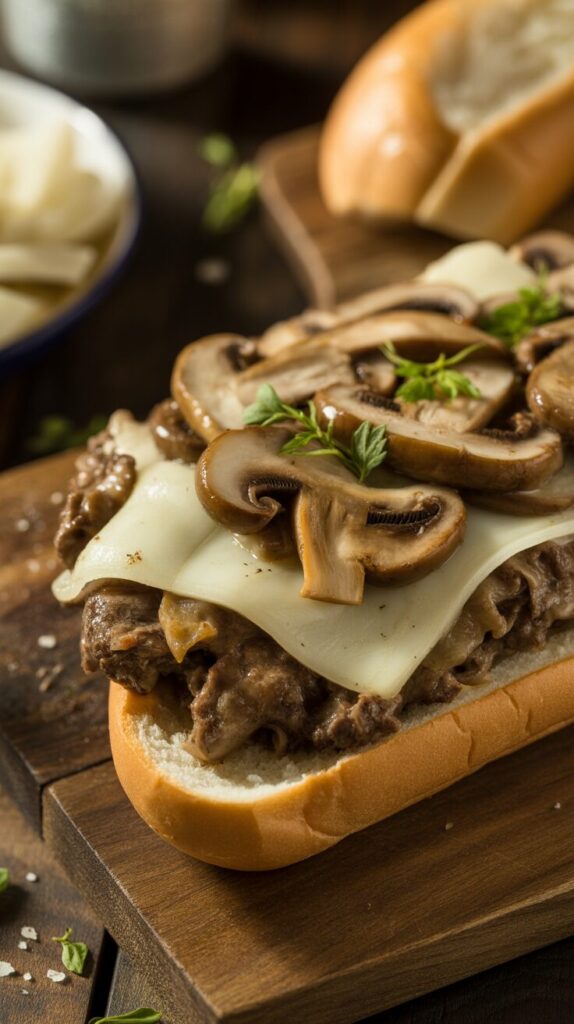
The Cheese Melting Technique
This is crucial for achieving that perfect cheese pull:
Method 1: Classic Drape Method Place 2-3 slices of provolone (or your preferred cheese) directly on top of each pile of hot meat. Cover with a metal bowl or aluminum foil tent for 30-60 seconds until the cheese melts completely.
Method 2: Cheez Whiz Method Spoon warm Cheez Whiz directly onto the hot meat and mix it in slightly. This creates that famous creamy, cheesy coating.
Method 3: American Cheese Method Tear American cheese slices into pieces and scatter over the hot meat. Cover to melt, about 30 seconds.
Assembling the Sandwich
The final, glorious steps:
Step 1: Prepare the Rolls Slice the hoagie rolls lengthwise, but don’t cut all the way through—leave a hinge. Open them up like a book.
Step 2: Toast the Rolls Spread butter on the inside of each roll and place them butter-side down on the griddle or in a clean skillet for 1-2 minutes until golden and toasted. This adds texture and helps prevent sogginess.
Step 3: Build the Sandwich Place a toasted roll cut-side up. Using your spatula, scoop up one portion of the cheesy meat and place it directly into the roll.
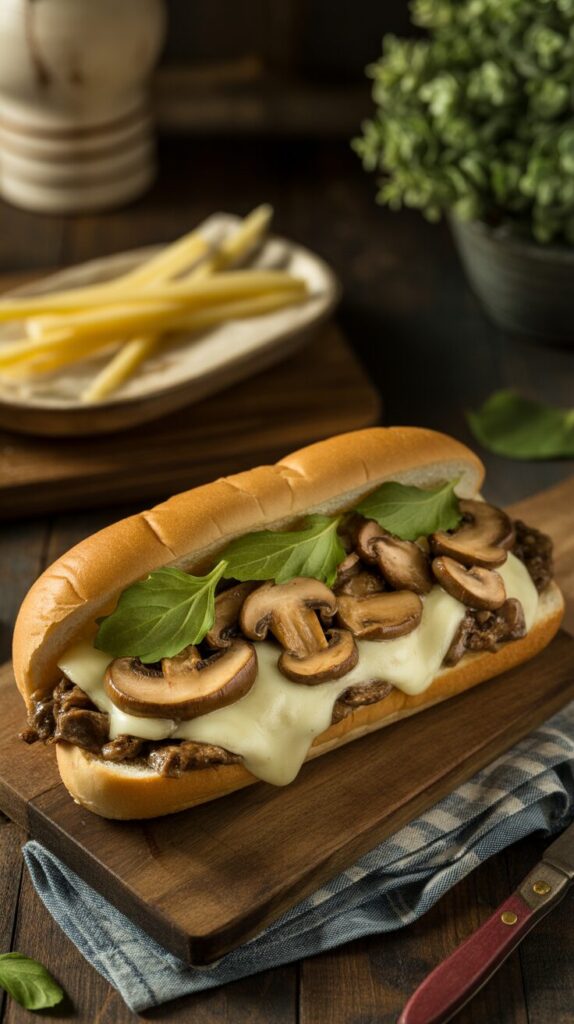
Step 4: Add the Vegetables Top the meat generously with the mushroom and onion mixture. Don’t be shy—pile them high!
Step 5: Close and Serve Fold the roll closed. The cheese should be oozing out the sides. Wrap the bottom half in aluminum foil or parchment paper for easier handling and to keep everything together.
Step 6: Serve Immediately These are best eaten right away while hot and melty. Have napkins ready—this is a messy, glorious experience!
Tips for the Perfect Philly Cheese Steak
Achieving Restaurant-Quality Results at Home
Get your cooking surface screaming hot: The high heat creates the sear and caramelization that makes cheese steaks irresistible. Don’t be afraid of a little smoke!
Don’t overcrowd the pan: Cook the meat in batches if necessary. Overcrowding creates steam instead of sear, resulting in gray, boiled-looking meat instead of caramelized perfection.
Work quickly: Once you start cooking the meat, everything moves fast. Have your rolls ready, cheese nearby, and vegetables warm and waiting.
Use the right tools: A large metal spatula or two smaller ones are essential for chopping and tossing the meat on the griddle.
Fresh is best: This sandwich is all about the moment—make it, eat it, enjoy it. It doesn’t keep well or reheat successfully.
The Great Cheese Debate
Philadelphians passionately debate the “correct” cheese:
Cheez Whiz: The original choice at Pat’s and Geno’s. Creates a creamy, smooth coating with that unique processed cheese flavor. It’s polarizing but authentic.
Provolone: More sophisticated, with actual cheese flavor. Melts beautifully and creates those gorgeous cheese pulls. My personal favorite.
American: Melts incredibly well, creates that classic diner cheese steak experience. Not as flavorful as provolone but ultra-creamy.
The truth: They’re all correct! Choose based on your preference. You can even use a combination—provolone for flavor, American for melt quality.
Choosing the Right Roll
The roll makes or breaks a cheese steak:
What to look for:
- Soft interior that absorbs juices
- Sturdy enough to hold heavy filling
- Slight crust that provides texture
- Not too thick—it should be about meat and cheese, not bread
Best options:
- Amoroso rolls (if you can find them—the gold standard)
- Local bakery Italian hoagie rolls
- Any soft sub roll labeled “Italian” or “hoagie”
Avoid:
- French baguettes (too crusty and thick)
- Whole wheat or multigrain (wrong texture and flavor)
- Overly soft hot dog buns (fall apart)
Making It Ahead (Sort Of)
Cheese steaks are best made fresh, but you can prep ahead:
Can be done ahead:
- Slice and season the meat (refrigerate up to 24 hours)
- Slice all vegetables (refrigerate up to 24 hours)
- Make the mushroom and onion mixture (refrigerate up to 2 days, reheat before using)
Must be done fresh:
- Cooking the meat
- Melting the cheese
- Toasting and assembling the sandwiches
Variations and Customizations
Chicken Philly Cheese Steak
Substitute thinly sliced chicken breast or thighs for the beef. Cook the same way—the mushrooms and cheese make this version incredibly satisfying.
Pizza Steak
Add marinara sauce and shredded mozzarella along with the provolone. The tomato sauce adds a whole new dimension.
Breakfast Cheese Steak
Add scrambled eggs to the sandwich along with the steak and cheese. Perfect for brunch!
Buffalo Chicken Cheese Steak
Use chicken instead of beef, toss it in buffalo sauce after cooking, and add blue cheese crumbles along with the provolone.
Pepper Steak
Load up on bell peppers—use red, green, and yellow for a colorful, sweet variation. Add a splash of soy sauce while cooking for Asian-inspired flair.
Loaded Cheese Steak
Add crispy bacon, jalapeños, and ranch dressing along with all the standard toppings for an over-the-top experience.
Vegan Cheese Steak
Use thinly sliced seitan or portobello mushrooms as the “meat,” vegan cheese, and load up on peppers and onions. Surprisingly satisfying!
What to Serve With Your Cheese Steak
Classic Sides
French Fries: Thick-cut, crispy, golden fries are the traditional accompaniment. Some people even put fries ON the sandwich!
Chips: Simple but satisfying—kettle chips add great crunch
Onion Rings: Golden, crispy, and delicious alongside the sandwich
Pickle: A tangy dill pickle spear cuts through the richness perfectly
Coleslaw: Creamy or vinegar-based, adds crunch and freshness
Drinks
Soda: Classic choice—Coke, Pepsi, or root beer Beer: An ice-cold lager or pilsner is perfect Milkshake: Sounds weird but the sweet/savory combo works Iced tea: Refreshing and not too heavy
Storage and Reheating (Though Not Recommended)
Storage
If you absolutely must save leftovers (though they’re never quite the same):
Disassemble the sandwich: Store meat/vegetable mixture separate from the bread Refrigerate: Keep in an airtight container for up to 2 days Don’t freeze: The vegetables and cheese don’t freeze well
Reheating
Best method:
- Reheat the meat and vegetable mixture in a skillet over medium heat until hot
- Add cheese and let it melt
- Use a fresh roll, toast it, and rebuild the sandwich
Avoid: Microwaving the assembled sandwich—it makes the roll soggy and rubbery
Troubleshooting Common Issues
Problem: The meat is tough Solutions:
- Slice thinner next time
- Make sure you’re slicing against the grain
- Don’t overcook—high heat, quick cooking is key
- Use ribeye or another well-marbled cut
Problem: The sandwich is soggy Solutions:
- Toast the rolls properly to create a barrier
- Don’t add too much liquid (like oil from the pan)
- Make sure vegetables are well-drained before adding
- Eat immediately—these don’t sit well
Problem: The cheese didn’t melt properly Solutions:
- Make sure the meat is very hot when you add cheese
- Cover with a lid or foil to trap heat and steam
- Give it enough time—30-60 seconds covered
- Consider using American cheese, which melts most easily
Problem: Everything fell apart Solutions:
- Use a sturdier roll next time
- Don’t overfill—less is sometimes more
- Wrap the bottom in foil or paper for structure
- Hold it with both hands and commit!
Problem: It’s too greasy Solutions:
- Use leaner cuts like top sirloin
- Drain excess fat from the pan before adding cheese
- Don’t add extra oil or butter beyond what’s in the recipe
- Let it sit on paper towels for 30 seconds before eating
Why This Recipe Works
This Philly cheese steak with mushrooms succeeds because it follows proven techniques while adding a delicious twist:
Thin slicing: Creates tender, quick-cooking meat that absorbs flavors
High heat: Develops caramelization and that signature char
Proper seasoning: Simple but effective—lets the beef shine
Caramelized vegetables: Adds sweetness and depth that complements the savory meat
Mushrooms: Provide umami and meaty texture that enhances rather than overwhelms
Good cheese: Melts properly and creates that gorgeous cheese pull
Quality roll: Holds everything together while adding pleasant texture
Each element is carefully considered to create the ultimate cheese steak experience.
Final Thoughts
Making an authentic-tasting Philly cheese steak at home is absolutely achievable, and adding savory mushrooms takes it to a whole new level of deliciousness. This isn’t a sandwich you eat politely—it’s messy, drippy, cheesy, meaty perfection that requires napkins, enthusiasm, and preferably good company to share in the joy.
Whether you’re craving that classic Philly experience, want to impress guests with your sandwich-making skills, or simply need a satisfying dinner that’s more exciting than your usual weeknight fare, this recipe delivers. The combination of tender ribeye, caramelized onions, golden mushrooms, melted cheese, and a perfectly toasted roll creates a flavor explosion that justifies all the hype.
So fire up that griddle, slice that steak thin, get those onions caramelizing, and prepare yourself for one of the most satisfying sandwich experiences you’ll ever have. Your kitchen might get messy, you’ll definitely need extra napkins, but the end result—that first bite of hot, melty, savory perfection—makes it all worthwhile.
Now get cooking and enjoy every glorious, cheesy, meaty bite!
Quick Recipe Summary
Prep Time: 20 minutes (plus 30-45 minutes for freezing steak)
Cook Time: 25 minutes
Total Time: About 1 hour 15 minutes
Servings: 4 sandwiches
Difficulty: Moderate
Best enjoyed: Immediately, while hot and melty!