Homemade Sushi Recipe: Easy Guide for Beginners
Making Sushi Recipe at home transforms an intimidating restaurant delicacy into an accessible, fun culinary project that delivers fresh, customizable rolls at a fraction of takeout costs. This beginner-friendly recipe demystifies the sushi-making process, breaking it into simple steps that anyone can master with practice, basic equipment, and quality ingredients readily available at most grocery stores. Homemade sushi allows complete control over ingredients, accommodating dietary restrictions, preferences, and creativity impossible when ordering from restaurants with limited menu options and standardized preparations. The rolling technique requires practice but isn’t difficult once you understand the fundamentals, and imperfect rolls still taste delicious while you develop skills through repeated attempts and experimentation. Whether you’re hosting sushi nights with friends, looking for healthier alternatives to heavy dinners, or simply want to learn this impressive culinary skill, making sushi at home offers rewarding experiences beyond just eating the finished product. Discover how to make restaurant-quality sushi rolls in your own kitchen using this comprehensive beginner’s guide.
Recipe Quick Facts
| Detail | Information |
|---|---|
| Prep Time | 45 minutes |
| Cook Time | 25 minutes (rice only) |
| Total Time | 1 hour 10 minutes |
| Servings | 6-8 rolls (48-64 pieces) |
| Difficulty | Intermediate |
| Cuisine | Japanese |
Essential Equipment – Sushi Recipe
Required Tools
- Bamboo sushi rolling mat (makisu)
- Sharp knife for cutting rolls
- Rice cooker or pot with lid
- Large wooden or plastic bowl for rice
- Small bowl of water for sealing
- Plastic wrap for covering mat (optional but recommended)
Helpful But Optional
- Rice paddle or wooden spoon
- Kitchen towel for wiping knife
- Cutting board
- Small dishes for organizing fillings
- Chopsticks for eating
Ingredients
For the Sushi Rice
- 2 cups short-grain sushi rice (Japanese rice)
- 2½ cups water
- ⅓ cup rice vinegar
- 3 tablespoons sugar
- 1 teaspoon salt
For Rolling
- 10 sheets nori (seaweed)
- Fillings of your choice (see filling options below)
Classic Filling Options
Proteins:
- Sushi-grade raw tuna or salmon (sliced into strips)
- Cooked shrimp
- Imitation crab (surimi)
- Smoked salmon
- Cooked egg (tamagoyaki)
Vegetables:
- Cucumber (peeled, seeded, cut into strips)
- Avocado (sliced)
- Carrot (julienned)
- Cream cheese
- Asparagus (blanched)
For Serving
- Soy sauce
- Wasabi paste
- Pickled ginger (gari)
- Sesame seeds (optional)
- Sriracha or spicy mayo (optional) Sushi Recipe
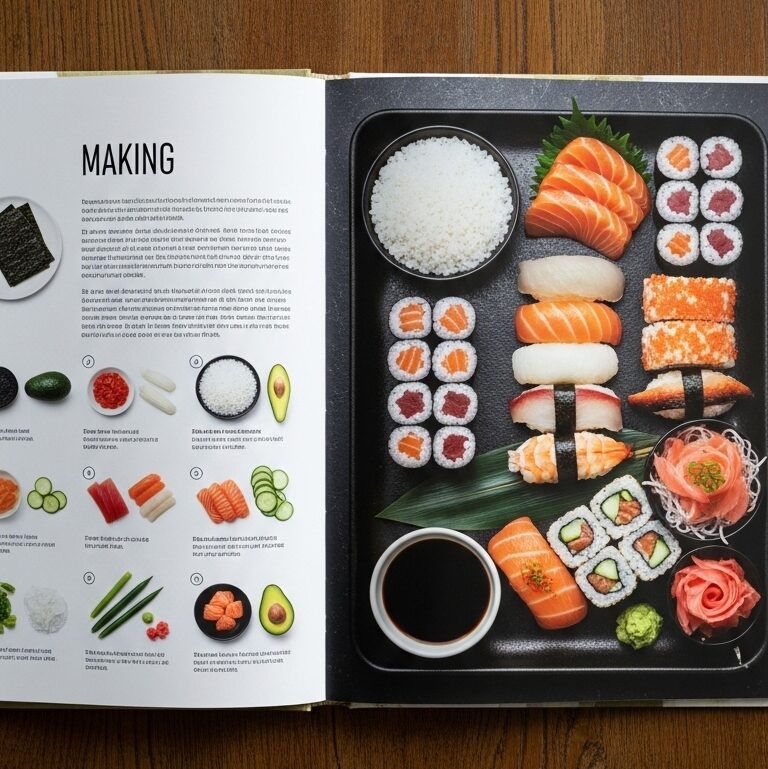
Step-by-Step Instructions
Prepare Perfect Sushi Rice

Rinse the sushi rice thoroughly under cold running water in a fine-mesh strainer, swirling gently until the water runs clear rather than cloudy with starch that would make rice gummy. This crucial washing removes excess starch that causes rice to become sticky and clumpy rather than achieving the slightly sticky but separate grain texture proper sushi rice requires consistently. Cook rice according to package directions or rice cooker instructions, using the 2 cups rice to 2½ cups water ratio for proper texture and moisture content throughout cooking. While rice cooks, combine rice vinegar, sugar, and salt in small saucepan over low heat, stirring until sugar dissolves completely creating the seasoning mixture that gives sushi rice its characteristic flavor. Once rice finishes cooking, transfer immediately to large bowl and drizzle the vinegar mixture over the hot rice, using cutting and folding motions rather than stirring to incorporate seasoning without crushing delicate grains. Fan the rice while mixing to cool it quickly and create the glossy appearance characteristic of properly prepared sushi rice that’s ready for rolling when cooled to room temperature.
Prepare Your Fillings – Sushi Recipe
While rice cools, prepare all filling ingredients so everything is ready for efficient rolling without interruptions that cause rice to dry out or become unworkable during the assembly process. Slice proteins into thin strips approximately ¼ inch thick and 4-5 inches long, ensuring uniform sizes that roll evenly without creating lumps or uneven distribution throughout the finished rolls. Cut cucumber in half lengthwise, scoop out seeds with spoon, then slice into thin strips matching the protein dimensions for consistent filling sizes and even texture distribution when eating. Slice avocado in half, remove pit, and cut flesh into thin slices while still in the peel, then scoop out gently to maintain shape and integrity during rolling and cutting. Arrange all prepared fillings on a large plate or in small bowls for easy access during rolling, keeping everything organized and within reach preventing frustration during assembly process.
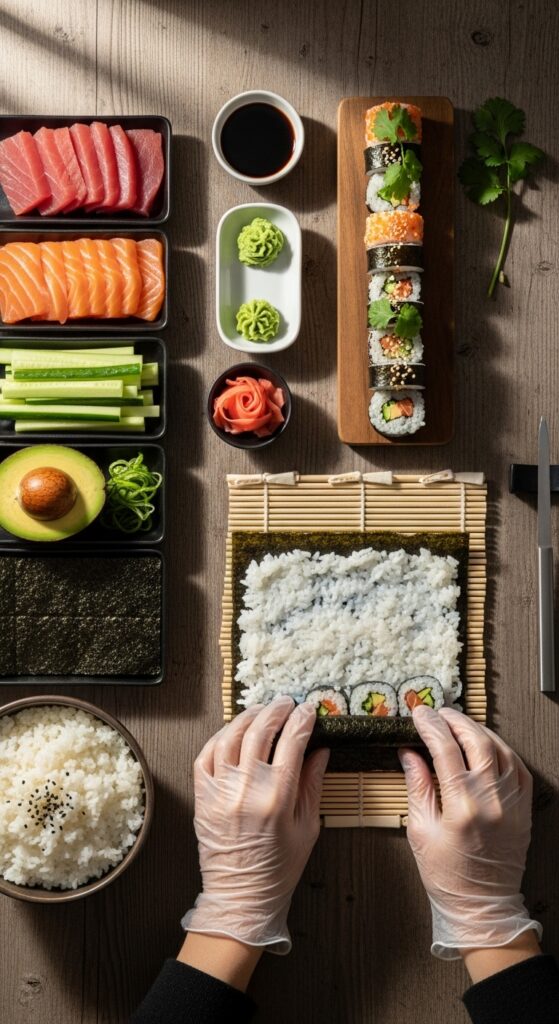
Set Up Your Rolling Station
Cover your bamboo mat with plastic wrap if desired, preventing rice from sticking in the mat’s crevices and making cleanup significantly easier after finishing your sushi-making session. Fill a small bowl with water for moistening hands and sealing roll edges, as dry hands cause rice to stick making the rolling process frustrating and messy unnecessarily. Have your knife, cutting board, and damp towel ready for wiping knife between cuts ensuring clean slices rather than compressed, ragged edges that ruin roll presentation and appearance. Place the nori sheet shiny side down on the mat with the lines running horizontally, positioning it properly for rolling in the correct direction that maintains structural integrity throughout.
Assemble and Roll
Wet your hands in the water bowl to prevent rice from sticking, then grab a handful of rice (about ¾ cup) and spread it evenly across the nori leaving a 1-inch border at the top edge clear. Press rice gently but firmly into an even layer about ¼ inch thick, ensuring no gaps or thin spots that would create structural weaknesses in the finished roll when cutting. Arrange your chosen fillings in a horizontal line across the center of the rice, using restraint and avoiding overfilling which makes rolling difficult or impossible without ingredients squeezing out. Using the mat as your guide, lift the bottom edge and begin rolling tightly away from you, applying even pressure to create a compact cylinder without gaps between layers throughout. When you reach the bare nori edge, wet it slightly with water and complete the roll, pressing gently to seal the seam and maintain the tight cylindrical shape during cutting and serving.
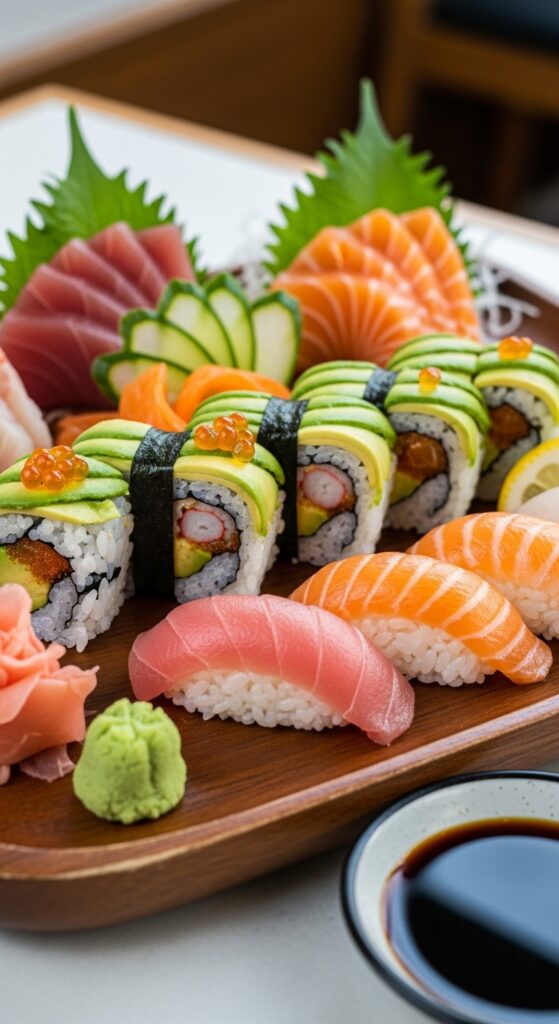
Cut and Serve
Let the completed roll rest seam-side down for a minute, allowing the moisture to seal the nori properly before cutting prevents the roll from coming apart during slicing. Using a very sharp knife dampened with water, slice the roll in half using a gentle sawing motion rather than pressing down which compresses and ruins the appearance significantly. Cut each half into thirds or quarters depending on desired piece size, wiping knife clean with damp towel between each cut ensuring pristine, clean edges rather than ragged, messy ones. Arrange pieces on a serving platter with cut sides facing up showing off the beautiful interior ingredients and spiral pattern that makes sushi so visually appealing and artistic. Serve immediately with soy sauce, wasabi, and pickled ginger, enjoying the fresh flavors and textures while rice is at perfect temperature and consistency for optimal eating experience.
Tips for Sushi-Making Success
Use Proper Rice: Short-grain Japanese sushi rice is essential—regular long-grain rice won’t work as it lacks the stickiness needed to hold rolls together successfully during preparation and eating. Look for packages specifically labeled “sushi rice” or “Japanese short-grain rice” at Asian markets or the international aisle of well-stocked grocery stores for authentic results. Never substitute instant rice, brown rice, or other varieties as they lack the proper starch content and texture that makes sushi rice work effectively in rolled applications.

Don’t Overfill: Beginners always overfill rolls making them impossible to close properly, so use less filling than you think necessary until you develop feel for proper amounts. A thin line of 2-3 ingredients across the center is sufficient—the rice is the star and too much filling overpowers it while making rolling technically difficult or impossible. Remember you can always make another roll if you’re still hungry, but you can’t fix an overstuffed roll that won’t close or cuts messily creating frustrating dining experiences.
Keep Everything Moist: Sushi rice dries quickly when exposed to air, so cover unused rice with damp towel while working and wet hands frequently preventing frustrating sticking throughout the rolling process. The small water bowl is essential—don’t skip it thinking you can manage without, as dry hands make rice stick impossibly while wet hands allow smooth, easy working.
Practice Makes Perfect: Your first rolls will likely be misshapen or loose—this is completely normal and expected when learning any new hands-on culinary skill requiring coordination and technique. Keep practicing and you’ll quickly develop the muscle memory and feel necessary for tight, beautiful rolls that slice cleanly and look professionally made despite home kitchen origins.
Popular Roll Variations
California Roll: Imitation crab, cucumber, and avocado—the most popular American sushi roll that’s perfect for beginners and those hesitant about raw fish options in traditional preparations. Some versions include sesame seeds on the outside creating “inside-out” rolls where rice is exterior rather than nori showing, requiring plastic wrap on your mat preventing sticking.
Spicy Tuna Roll: Mix diced raw tuna with sriracha and mayo, add cucumber strips for crunch, creating the spicy, creamy filling that’s become an American sushi restaurant staple. This requires sushi-grade tuna from reputable sources ensuring safety when consuming raw fish at home without professional preparation and handling protocols restaurants maintain.
Philadelphia Roll: Smoked salmon, cream cheese, and cucumber create the bagel-and-lox inspired roll that bridges Western and Japanese flavors in accessible, beginner-friendly combination everyone enjoys. The cream cheese adds richness and helps bind ingredients while the smoked salmon eliminates raw fish concerns that make some people nervous about homemade sushi consumption.
Vegetable Roll: Cucumber, avocado, carrot, and asparagus create satisfying vegetarian option that’s healthy, colorful, and perfect for those avoiding fish entirely while still enjoying sushi experience. Add cream cheese or tofu for protein, or keep it purely vegetable-based for vegan-friendly rolls that accommodate various dietary preferences and restrictions successfully.
Food Safety Considerations
When using raw fish, purchase only sushi-grade seafood from reputable fish markets or specialty stores that specifically label products as safe for raw consumption and sushi preparation. Sushi-grade fish has been frozen at temperatures that kill parasites, making it safe to eat raw unlike regular fish which may contain harmful organisms requiring cooking. Keep raw fish refrigerated at 40°F or below until immediately before use, and consume within 24 hours of purchase preventing bacterial growth that causes foodborne illness. If you’re uncertain about raw fish safety or sources in your area, stick with cooked proteins like shrimp, imitation crab, or smoked salmon that eliminate food safety concerns entirely.
Wash hands thoroughly before and during sushi preparation, keeping work surfaces clean and using separate cutting boards for fish and vegetables preventing cross-contamination that causes illness. Pregnant women, young children, elderly individuals, and those with compromised immune systems should avoid raw fish entirely, choosing fully cooked options that eliminate foodborne illness risks entirely.
Storing Leftover Sushi
Sushi tastes best when freshly made, as rice begins drying and hardening once exposed to refrigerator air causing unpleasant texture changes nobody enjoys eating unfortunately. If you must store leftovers, wrap individual rolls tightly in plastic wrap and refrigerate for no more than 24 hours, though quality degrades significantly during storage making this option suboptimal. Never freeze sushi as rice texture becomes unpleasantly hard and grainy when thawed, while fish quality suffers dramatically making frozen sushi essentially inedible and unenjoyable to consume.
Instead of storing finished rolls, consider refrigerating prepared rice and fillings separately, assembling fresh rolls as needed over 2-3 days while maintaining better quality and texture throughout consumption period. This approach requires slightly more effort but delivers superior results compared to pre-rolled sushi that’s been refrigerated overnight losing its essential freshness and appeal.
Conclusion
Making sushi at home demystifies this beloved Japanese cuisine, transforming it from restaurant-only luxury into accessible homemade meal that’s fun to prepare and infinitely customizable to personal preferences. The initial investment in bamboo mats and learning the rolling technique pays dividends through countless future sushi nights that cost a fraction of restaurant prices while delivering fresher, more personalized results. Don’t be discouraged if your first attempts aren’t perfect—sushi-making is a skill that improves dramatically with practice, and even imperfect rolls taste delicious when made with quality ingredients and care. The social aspect of making sushi with family or friends transforms meal preparation into entertainment, creating memories and teaching valuable culinary skills that last lifetimes beyond single meals. Master this homemade sushi recipe and you’ll possess an impressive skill that delights dinner guests, saves money, and allows you to enjoy fresh, restaurant-quality sushi whenever cravings strike without leaving home.