12 Wood Craft Ideas: Creative Projects for Every Skill Level
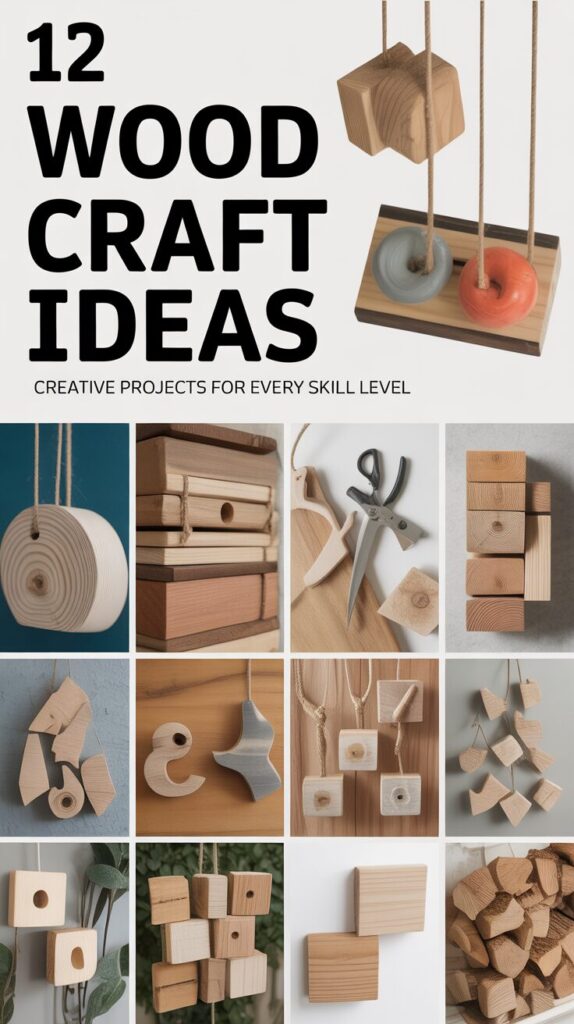
Working with wood offers a timeless, rewarding creative outlet that combines artistry with functionality, producing beautiful handcrafted pieces that last for generations. Whether you’re a complete beginner with basic hand tools or an experienced woodworker with a fully-equipped workshop, wood crafting provides endless opportunities for self-expression and skill development. The natural beauty of wood grain, the satisfying process of shaping raw materials, and the pride of creating something useful with your own hands make woodworking one of the most fulfilling hobbies. From simple weekend projects to ambitious furniture builds, these twelve wood craft ideas will inspire your next creation. Discover projects that range from decorative accents to practical household items, each offering unique challenges and beautiful results.
1. Rustic Wooden Serving Trays
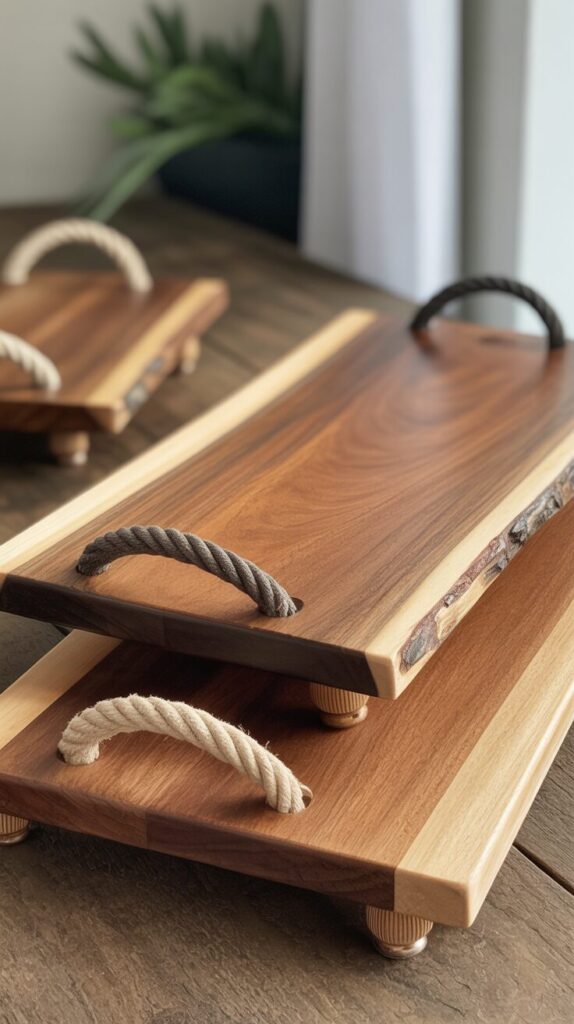
Create beautiful serving trays from hardwood boards with live edges that showcase the natural character and organic beauty of the wood. Cut boards to your desired dimensions (typically 12×18 inches for standard trays), sand thoroughly through progressive grits, and attach decorative handles made from rope, leather, or contrasting wood. Apply food-safe mineral oil or butcher block conditioner to enhance grain patterns while protecting the wood from moisture and staining during use. Add rubber feet to the bottom corners to protect furniture surfaces and prevent sliding during serving, making your trays both beautiful and functional. These trays make excellent gifts and can be customized with wood-burned designs, carved patterns, or painted accents that reflect personal style preferences.
2. Reclaimed Wood Wall Art
Transform salvaged barn wood, pallet boards, or driftwood into stunning geometric wall art that adds texture and warmth to any interior space. Arrange weathered boards in patterns like chevrons, herringbones, hexagons, or abstract compositions, embracing the varied colors and textures created by natural aging. Cut pieces to consistent widths but varying lengths for dynamic visual interest, then attach them to a backing board using wood glue and finishing nails. Seal the finished piece with matte polyurethane to preserve the weathered character while protecting against dust accumulation and environmental damage. This project celebrates imperfections and patina, turning discarded materials into sophisticated artwork that tells a story of the wood’s previous life.
3. Hand-Carved Wooden Spoons

Craft functional kitchen utensils from hardwoods like cherry, walnut, or maple using carving knives, gouges, and sandpaper for a meditative, hands-on woodworking experience. Start with spoon blanks or cut your own from dry lumber, sketching your desired shape before carefully removing material with sharp carving tools. Progress from rough shaping with larger gouges to fine detail work with smaller knives, constantly checking thickness and curve for comfortable ergonomics and practical use. Sand progressively to 320 grit for a silky-smooth finish, then treat with food-safe mineral oil or walnut oil applied in multiple thin coats. Hand-carved spoons develop beautiful patina with use, becoming treasured kitchen companions that improve with age and connect you to traditional craft heritage.
4. Wooden Plant Stands and Boxes
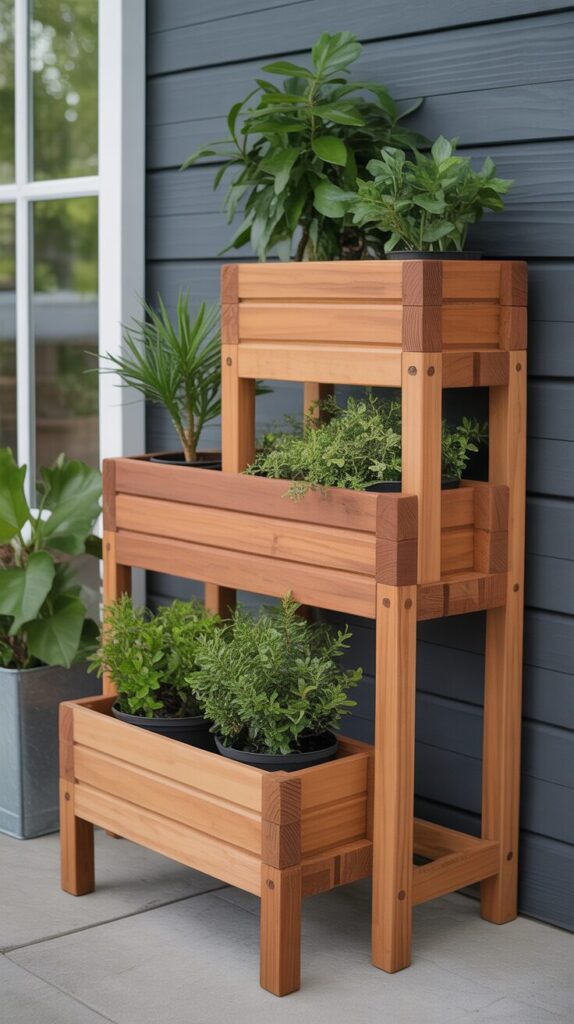
Design tiered plant stands or decorative planter boxes that elevate greenery while adding architectural interest to indoor and outdoor living spaces. Build simple box structures using cedar or redwood for outdoor durability, or use pine and hardwoods for interior displays that complement your décor style. Create drainage holes in the bottom of planters and line interiors with plastic to protect wood from constant moisture exposure that causes rot. Add legs, corner posts, or stacked designs to create multiple levels that maximize vertical growing space while showcasing plant collections at varying heights. Finish with exterior stain and sealant for weather protection, or paint in colors that coordinate with your home’s palette for cohesive design integration.
5. Wooden Cutting Boards and Charcuterie Boards
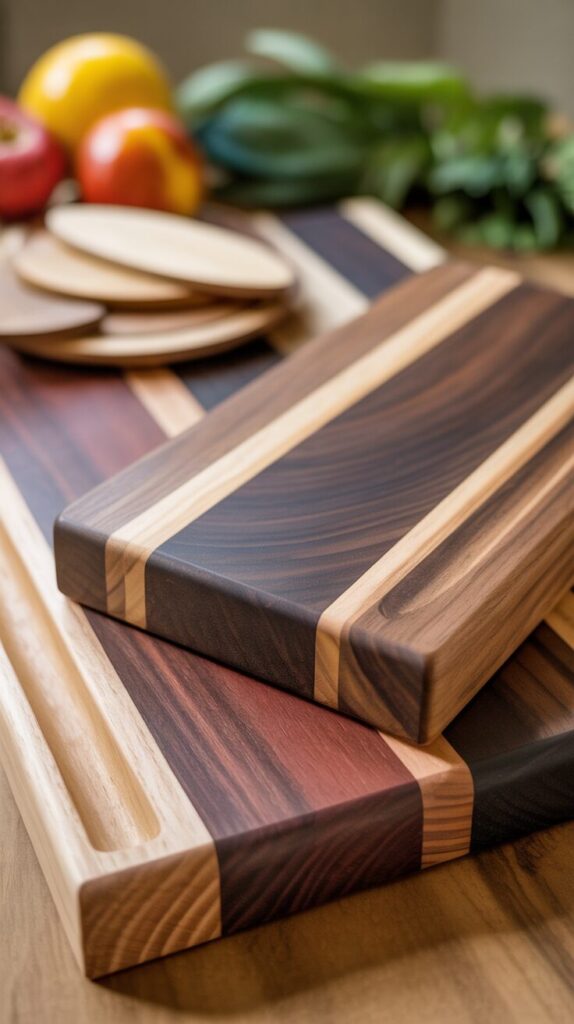
Construct durable cutting boards from edge-grain or end-grain hardwood combinations that create beautiful patterns while providing knife-friendly work surfaces. Choose non-porous hardwoods like maple, walnut, cherry, or teak that resist bacteria while withstanding repeated cutting and washing cycles throughout years of kitchen use. Glue boards together in alternating patterns for visual appeal, plane flat, then round edges and corners for comfortable handling during food preparation. Apply multiple coats of food-safe mineral oil followed by beeswax-based board cream to waterproof the wood and enhance the natural color contrasts between different species. These functional art pieces make impressive gifts that woodworkers of all skill levels can successfully create with basic tools and careful attention to detail.
6. Decorative Wooden Signs
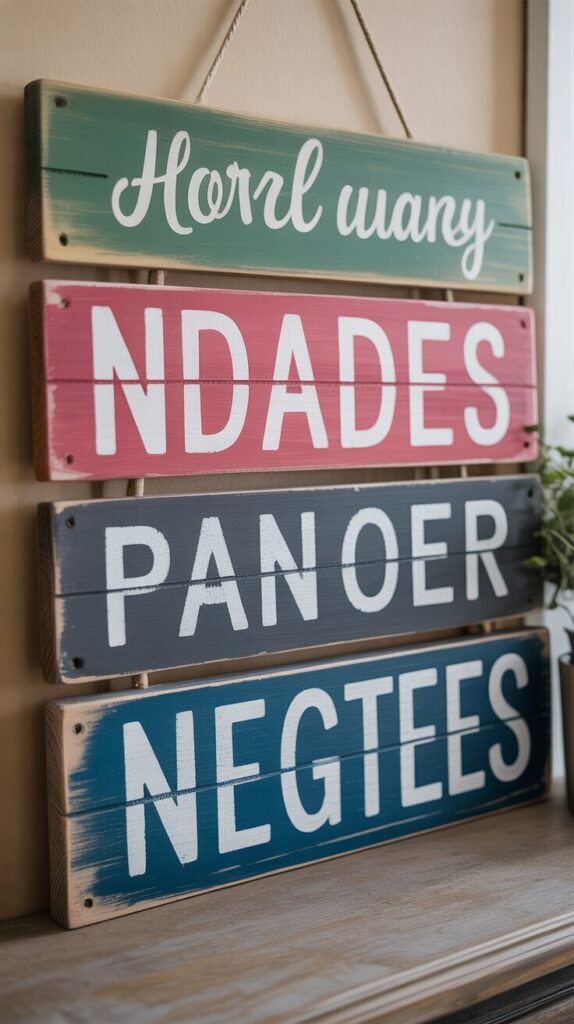
Craft personalized signs with inspirational quotes, family names, or house numbers using reclaimed boards, stencils, and paint for customized home décor. Cut boards to your desired size and shape, distress edges with sandpaper or wire brushes for vintage character, and apply base paint colors that complement your interior style. Transfer lettering using stencils, vinyl decals, or hand-painting for a custom look, then add decorative elements like borders, flourishes, or small carved accents. Seal finished signs with polyurethane or wax to protect painted surfaces from fading and damage while maintaining the handcrafted aesthetic you’ve created. These versatile projects adapt to any skill level—beginners can use simple stencils while advanced crafters can incorporate hand-lettering, wood-burning, or relief carving techniques.
7. Wooden Jewelry and Accessory Storage
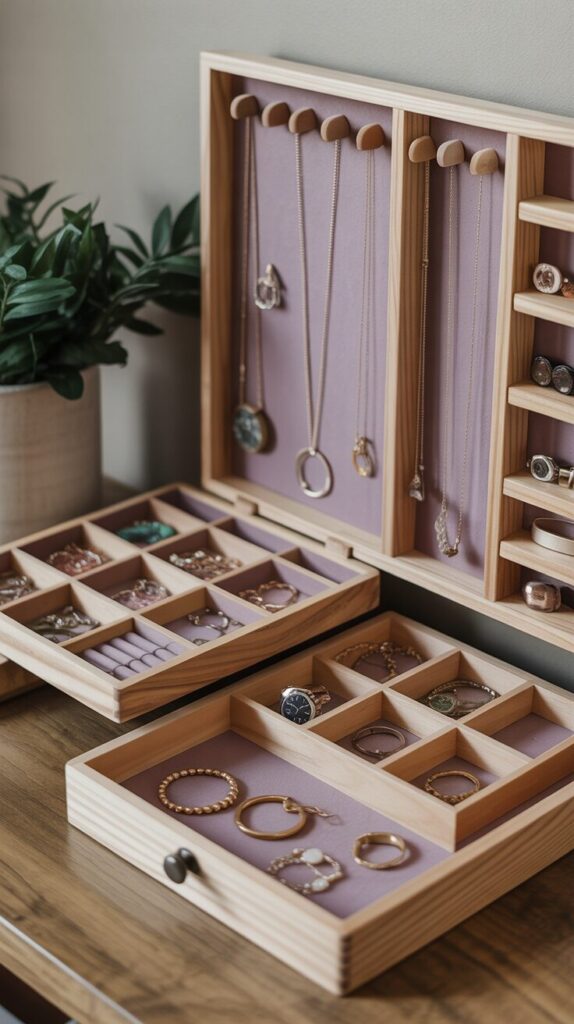
Build functional jewelry boxes, organizer trays, or wall-mounted display boards that keep accessories organized while showcasing fine woodworking joinery and design skills. Create compartmentalized trays with dividers for rings, earrings, and watches, or construct wall boards with hooks and shelves for necklaces and bracelets. Line drawers and compartments with felt or velvet to protect delicate jewelry from scratching while adding luxurious visual and tactile appeal. Incorporate decorative elements like inlaid contrasting woods, carved details, or turned knobs that transform utilitarian storage into heirloom-quality keepsake boxes. These projects develop essential woodworking skills including precise measurement, joint construction, and finishing techniques while producing genuinely useful household items.
8. Wood-Turned Bowls and Vessels

Master the art of wood turning by creating bowls, vases, and decorative vessels from solid wood blanks using a lathe and specialized turning tools. Select interesting wood species with dramatic grain patterns, burls, or spalting that create natural artwork as layers are revealed during the turning process. Mount blanks securely on the lathe, carefully remove material from outside and inside using gouges and scrapers, then sand progressively while spinning for uniform smoothness. Apply food-safe finishes like mineral oil for functional bowls or lacquer and wax for decorative pieces that highlight the wood’s natural beauty. Wood turning offers immediate gratification as rough blocks quickly transform into elegant curved forms, making it an addictive and meditative woodworking discipline.
9. Wooden Candle Holders and Lanterns

Design atmospheric lighting accents by crafting candle holders from solid wood blocks or constructing lantern frames with glass panel inserts for safe ambient illumination. Drill precise holes sized for standard taper candles, tea lights, or pillar candles using Forstner bits for clean, flat-bottomed recesses that hold candles securely. Create visual interest through varied heights in multi-holder arrangements, carved decorative details, or contrasting wood combinations that complement your interior design scheme. For lanterns, build wooden frames using mortise-and-tenon or half-lap joints, then insert glass panels secured with trim molding that protects flames while allowing light to radiate outward. These projects combine practical function with decorative appeal, creating cozy ambiance while showcasing your woodworking craftsmanship through thoughtful design and execution.
10. Wooden Toy and Game Sets

Craft heirloom-quality toys, puzzles, or board games from hardwoods that provide screen-free entertainment while developing fine motor skills in children and adults alike. Build classic projects like stacking blocks, wooden cars and trucks, chess sets, or cribbage boards that withstand generations of play and handling. Ensure all edges are thoroughly rounded and sanded smooth to eliminate splinters and sharp corners that could cause injury during enthusiastic play sessions. Use non-toxic, child-safe finishes like food-grade mineral oil, beeswax, or water-based polyurethane that won’t harm curious young children who explore with their mouths. These meaningful projects create lasting memories and tangible connections between maker and recipient, often becoming treasured family heirlooms passed down through generations.
11. Wooden Picture Frames and Mirrors

Construct custom frames from hardwood strips or reclaimed materials that perfectly complement artwork, photographs, or mirrors while showcasing your joinery skills. Cut precise miter joints at 45-degree angles for professional-looking corners, then reinforce connections with glue, splines, or biscuit joints for lasting strength. Create depth and visual interest by routing decorative profiles along frame edges, or keep designs minimal and modern with simple squared edges. Stain or paint frames to match existing décor, or embrace natural wood tones that coordinate with furniture and architectural elements throughout your home. These versatile projects allow endless customization in size, style, and finish while producing functional items that display cherished memories and beautiful artwork.
12. Outdoor Wooden Furniture Projects
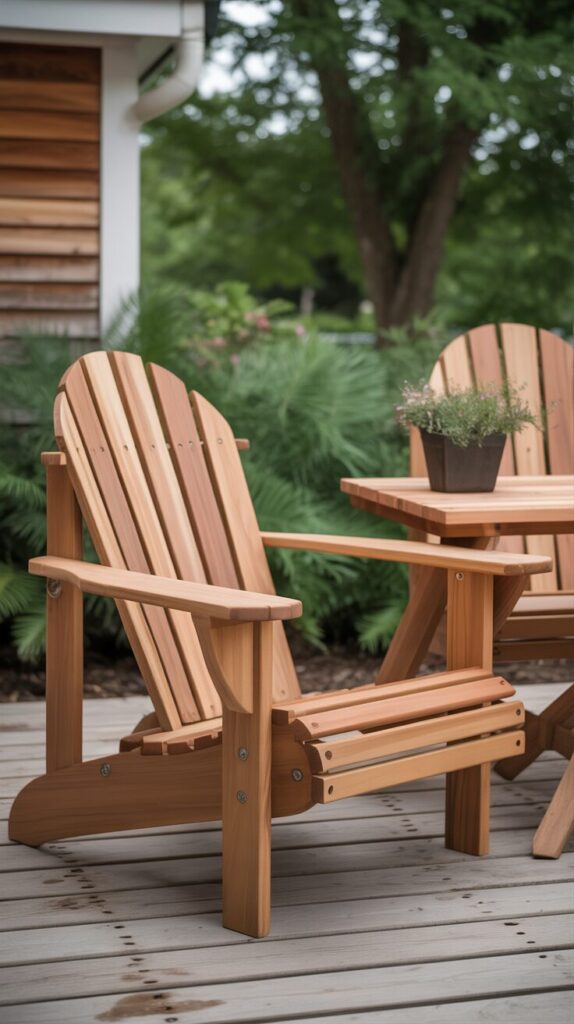
Build durable outdoor furniture like Adirondack chairs, benches, picnic tables, or planter boxes that enhance exterior living spaces while developing advanced woodworking skills. Choose naturally rot-resistant woods like cedar, redwood, or teak that withstand weather exposure, or use pressure-treated lumber for budget-friendly projects with extended outdoor durability. Master essential joinery techniques including lap joints, mortise-and-tenon connections, and pocket-hole construction that create strong assemblies capable of supporting weight and resisting racking forces. Apply marine-grade sealants, exterior stains, or natural oils that protect wood from UV damage, moisture penetration, and temperature fluctuations throughout seasonal cycles. These substantial projects provide immense satisfaction as you create functional furniture pieces that transform ordinary yards into inviting outdoor rooms for relaxation and entertainment.
Essential Woodworking Tips for Craft Success
Tool Selection and Safety: Invest in quality basic tools including a tape measure, combination square, hand saw or circular saw, drill, chisels, and various sandpaper grits before expanding to specialized equipment. Always wear safety glasses when cutting or sanding, use dust masks for prolonged sanding sessions, and keep cutting tools sharp since dull blades require excessive force that causes dangerous slips. Establish a dedicated workspace with proper lighting, ventilation, and organization systems that keep tools accessible while maintaining safe, clutter-free work surfaces.
Wood Selection Strategies: Choose wood species based on project requirements—softwoods like pine and cedar for beginners and outdoor projects, hardwoods like oak, maple, and walnut for furniture and items requiring durability. Inspect boards carefully for defects including knots, splits, warping, and excessive moisture that compromise structural integrity and finishing results. Allow purchased lumber to acclimate in your workshop for several days before cutting to stabilize moisture content and prevent later warping or cracking in completed projects.
Accurate Measurement and Layout: Remember the carpenter’s maxim “measure twice, cut once” to avoid costly material waste and project setbacks from incorrect dimensions. Use sharp pencils or marking knives for precise lines, and always mark waste sides of cut lines with X’s to prevent confusion during cutting operations. Double-check square and alignment frequently throughout assembly since small errors compound quickly, resulting in ill-fitting joints and crooked assemblies that require difficult corrections.
Sanding and Surface Preparation: Progress through sandpaper grits systematically—start with 80-100 grit to remove mill marks and shape surfaces, advance to 150 grit for general smoothing, then finish with 220 grit for final preparation. Always sand with the grain direction to avoid cross-grain scratches that become painfully visible when stain or finish is applied to bare wood. Remove all sanding dust thoroughly with tack cloths or compressed air before applying finishes, since dust particles create rough, unprofessional texture in dried finish coats.
Finishing Techniques: Test stains and finishes on scrap pieces of your project wood to preview color and appearance before committing to visible surfaces of your actual project. Apply multiple thin coats rather than single heavy applications to avoid drips, runs, and uneven coverage that mar the appearance of carefully crafted projects. Allow adequate drying time between coats as specified by manufacturer instructions, and lightly sand between coats with 320-grit paper for smooth, professional-looking results that rival commercial products.
Project Planning and Design: Create detailed sketches with dimensions before beginning construction to visualize proportions, identify potential problems, and calculate accurate material quantities needed for completion. Break complex projects into manageable sub-assemblies that can be constructed and fitted separately before final assembly, reducing confusion and making error correction easier. Maintain realistic expectations about time requirements—most projects take longer than anticipated, especially for beginners developing new skills and problem-solving approaches.
Conclusion
Wood crafting offers an accessible, deeply satisfying creative pursuit that produces beautiful, functional objects while developing valuable skills and connecting you to centuries of craftsmanship tradition. These twelve diverse project ideas demonstrate that woodworking welcomes practitioners at every skill level, from simple serving trays that beginners can complete in an afternoon to complex furniture builds that challenge experienced craftspeople. The key to woodworking success lies in starting with appropriate projects for your current skill level, using quality materials and sharp tools, and maintaining patience throughout the learning process as techniques improve through practice. Whether you’re creating gifts for loved ones, building furniture for your home, or simply enjoying the meditative process of shaping wood with your hands, each completed project brings immense satisfaction and tangible proof of your growing abilities. Select a project that excites you, gather your materials and tools, and begin your woodworking journey today—the rewarding world of wood crafting awaits your creative vision.
Frequently Asked Questions
What tools do I need to start woodworking? Essential beginner tools include a tape measure, combination square, handsaw or circular saw, cordless drill with bits, set of chisels, clamps, and various sandpaper grits totaling around $150-300. As skills develop, gradually add specialized tools like routers, miter saws, and table saws that expand project possibilities and improve efficiency.
What’s the best wood for beginners? Pine and poplar offer affordable, easy-to-work options for learning basic techniques without expensive material investment. These softwoods cut easily, accept screws well, and forgive minor mistakes while you develop skills that transfer to working with premium hardwoods later.
How do I prevent wood from splitting when screwing? Drill pilot holes slightly smaller than screw shaft diameter to create clearance that prevents wood fibers from being forced apart during fastener installation. Use sharp drill bits and screws designed for wood applications, and avoid over-tightening which stresses wood fibers beyond their capacity.
Should I use glue, screws, or both for joints? Wood glue alone creates stronger bonds than the wood itself when properly applied to clean, tight-fitting joints with adequate clamping pressure during drying. Add screws or nails to reinforce joints in load-bearing applications, hold pieces during glue drying, or when joints aren’t perfectly fitted for maximum glue contact.
How do I achieve a smooth finish? Success requires thorough sanding progression through increasingly fine grits, complete dust removal before finishing, and multiple thin finish coats with light sanding between applications. Quality brushes or spraying equipment minimize brush marks, while proper ventilation and temperature control prevent finish defects like orange peel or premature drying.